We both think she's finally lost some weight. Next week I'll get some photos of her in roughly the same positions as the 1st week she was here for comparison.
I knit Sweden!
(you wouldn't believe what a collection requires)
Thus to get to my final project university talking.
(I cut out,mood boards, technique etc etc)
And unusually for me, I have made a quick design sheet first.
Cont
The only reason for having designs, is that before Xmas I seemed to have so many projects on the go........(unusually for me! not...) lots of those knit ideas all in my head.
So to realive the stress I wrote them down, In my book that came with me from England. I had almost emptied it as it was full of all those JUST Did'NT GET TIME TO-DO,S. And luckily getting to work from home and complete them as an unpaid artist, the book is currently getting topped back up!
(I cant possibly returen to the British rat race, I need one more year!)
To make my name known.....
So I drew these out, as i figured it is quite a good concept, I sketeched them in £1 shop pastel and I used Monet's atlas for the flags.
And of course I am probably repeating what has been done before!.
But thats life?, nothing is really new it's all be done before. We should just all get our own chance at re-doing it! ( A little differently)
Canadian bikini will be fun!
(I think I will need to look closer at the flag as my maple leafs have a few to many prongs!)
We Can't all be perfect.....
Large Crochet
Naughty But nice!
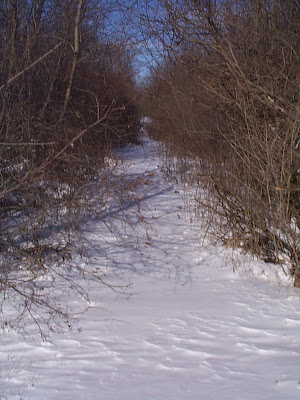
ahhh, sunshine!
...which covers everything from winter weeds to snow crystals to bird nests and more. The pen and ink drawings are great...
I think I'll spend some time looking them over tonight. Have a great evening.
Learn how to Spin!
Needle Felting Class
If this class interests you, all of the needle felting supplies that you will need are available at The Scarlet Skein. The cost is $15 for a 2 hour workshop. In the class I teach how to use the tools and give you design ideas. Needle felting is very easy and is a great way to embellish felted items. It's a perfect follow up to the Felted Clogs class.
I will be offering the class again in March so keep an eye on the schedule.
Knitting Three Colors Per Row
First of all, you don't even have to knit three or four colors per row. Instead you can just knit with two colors and later go back and duplicate stitch the third color. Or you can just knit with two colors, slipping all the stitches that are to be knit with the third color. Then you go back and knit the exact same row again, slipping the stitches you just knit and knitting the third and fourth color stitches you slipped previously.
Still, if you want to knit 3 colors per row there are many, many ways to do this. All are a variety of the methods I've shown last week. You can put all three yarns in your left hand, 3 yarns in your right hand, or 2 yarns in one hand and 1 yarn in the other hand. In knitting with 3 colors a row you don't even have to worry about finding a method that doesn't tangle because they all do as far as I can tell. I generally stop a few times per row to detangle the yarns when knitting 3 color rows.
Here's how I hold the yarns for a 3 color row. The background color is again in my right hand and the other two colors are both stranded over my left index finger.
Smock Coat progress and a half naked stand mixer
I've now finished the two sleeves, two fronts, and a good portion of the back.
It stopped pouring long enough for me to take a quick photo of the work in progress.
The pattern name is Cosima from the book Hip Knit Hats. It was made from Tahki Bunny. I used 2 skeins and size 9 needles. It knit up really fast! I completed it in 1 day!
I think that Ava should be my hat model from now on, because I think that hats don't look very flattering on me!
Oh yes.... and I started another new project a few weeks back!
I know, I know, but this is different ok! It is a basic sock (using the formula off of this blog) that I don't have to look at to knit. I'm keeping it in the car to knit (when Im a passenger of course), and at the movie theatre. I've done pretty good on it so far, only 2 minor yarn splitting mistakes! Pretty good for knitting in the dark!
I'm knitting it out of Twisted Sisters sock yarn. I cant remember the name exactly, I cant find the label. I believe its called Zazu in fingering weight. I am using size 0 needles.
Length reassignment surgery: lengthening and shortening knitwear
As a frequenter of Ravelry, I have discovered that
Now, this isn't very difficult, but it is scary the first time you try it, and there are a few shoals in the water, so that's the subject of today's post.
Let us suppose that you have a sleeve or a hat which is TOO SHORT or TOO LONG, and that you have knit
- from the top down
- in the round or back and forth
- in stockinette
Solution:
- Unravel and re-knit longer/shorter.
Let us suppose that you have a garment which is TOO SHORT or TOO LONG, and that you have knit
- from the bottom up
- in the round or back and forth
- in stockinette
- If you knit back and forth, unravel the seam to above the area where you will snip. If you knit round and round, just start right in with step 2.
- Snip one stitch of the garment in the round ABOVE the ribbing (for too short) or just where you want the ribbing to begin (for too long).
- Using a needle to pick out the yarn along the row or round (purple in the diagrams), unravel all the way around/across the garment.
- As each live loop pops free, catch it on your needles--the same needle you used to knit the garment in the first place. Don't worry now which way your stitch is laying, just worry about catching it.
- When the ribbing pops loose, put it aside, you will not need it now.
- Once all the live loops are caught on your needles, slip your way around the work again, re-orienting and catching each loop RIGHT ARM FORWARD.
- Attach a new, unkinked yarn by any of these methods: Russian join, overcast join, overlap join, back join.
- If the garment was too short, you are now ready to reknit, downwards, in stockinette to lengthen the garment sufficiently until it is time to start the ribbing again. This works because stockinette has the wonderful property of lining up REGARDLESS of whether it is knit "up" or "down."
- If the garment was too long, you are now ready to knit the ribbing from where your stitches are all on the needle. If you have taken out so much fabric that you are several increases higher in the garment, and there are more stitches on your needle than there were when you first knit the cuff/band/edging, switch to smaller (or even to MUCH smaller) needles to re-knit the cuff. This way, the cuff/band/edging will still fit, even though it is being re-knit on more stitches than the old one.
- If the garment was too short, and your leftover yarn is insufficient to do all the further knitting, unravel the part of the sleeve you popped off, and process it according to these instructions so that it can be reused.
Problem:
Your TOO SHORT or TOO LONG garment was not knit in stockinette. This means that the picked up stitches to be knit "downwards" will be a half-stitch off in the fabric pattern.
Solution:
- You need to think outside the box. If the fabric is a ribbing, do the additional knitting for the cuffs/bands/edging in a different ribbing. So, for example, if the garment fabric is 2x2 ribbing, do the edging ribbing in 2x1 or 1x1 or whatever other ribbing you've always had a hankering to try.
- If the fabric pattern is garter stitch, edge with seed stitch; if it is seed stitch, try a ribbing or a garter stitch, etc.
Your garment is TOO SHORT and you do not have enough yarn to make it longer, no, not even if you recycle the popped-off bits.
Solution:
- Matching or contrasting color: If the garment body or sleeves (or hat or other garment) is/are too short, unravel the bands and recycle that yarn to lengthen the garment. Then use a matching or contrasting color in the same weight and kind of yarn to re-knit the bands. A blue sweater with green or gray bands would look smashing, and no one but you would know you never meant to have it that way all along.
- Different dyelot of the same color: It often happens, however, that the same color is available, but in a different dyelot. In that case, do the same thing: recycle the yarn of the same dyelot out of the bands to lengthen the garment, and use the different dyelot for the bands. Bands are most often made in a different fabric stitch (ribbing, for example) than the main body of the garment (which might be made in stockinette). The change of fabric pattern on the bands hides the change of dyelot better than simply adding the new dyelot on in the stockinette portion.
- Add a stripe of a different color: I don't normally advocate Kitchener stitching (grafting) the snipped off bits back on--the Kitchener stitch is a very slow one, and progress is glacial. Also, there is often a noticeable tension difference between the garment fabric and the Kitchener-stitched row. However, every guideline is made to be broken, and in the case of a too-short sweater for a person of athletic build, a very good effect can be had by snipping and separating the body just below the underarm, or just above the bottom ribbing, and knitting in a stripe of a different color to go around the body. The other part of the sweater is then grafted back on. This can be a successful strategy for too-short sleeves on an athletic person's sweater, also. (Why only an "athletic person?" because a person with a fuller figure, male or female, is unlikely to be much complemented by a stripe just below the bust/chest, or worse yet, a stripe around the belly.) Oh, oh wait, this works on baby sweaters too, for you procrastinators whose target baby has lengthened while the project lay becalmed on the needles for several months. For babies, the stripe looks best just above the bottom ribbing. (Easy Kitchener stitching instruction here.)
Good luck--and if your problem is not solved here, try posting on the "technique" board on Ravelry, or send me an e-mail at TECHknitting@hotmail.com
--TECHknitter
You have been reading TECHknitting on: "lengthen knitting and shorten knitting."
waiting for the sun
...finding it very hard to get motivated, though there is plenty to do:
~sewing for the shop
~stripping wallpaper/painting entry
~P.I.F. gifts to complete
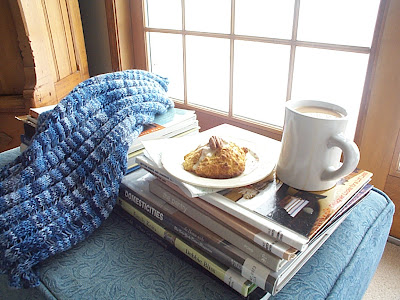
...drinking some tea and eating an orange scone instead..
...hoping for some sunshine and inspiration, soon!
Thank you, Jaime, for asking, and thanks to all for the nicest comments!
Better bands and cuffs--the wrap-up
The series starts with a prequel, and runs through 9 further posts, 11 total if you include the prequel and this wrap-up post. (Whew!)
The prequel to the series goes over knitted fabrics which don't curl: GARTER, SEED STITCH, RIBBING and DOUBLE MOSS STITCH.
The series proper starts with the post called "Opera and soap opera" which offers an overview of the problem. This post introduces NORM, WANDA and LON. Norm is a normal stitch--situated in the middle of a stockinette fabric. Norm is supported on all sides by his "sibling" and "cousin" stitches. These all share yarn so that stress leaves Norm literally unmoved--he is pinned in place and will return to shape when the stress (from a poking elbow or the like) is removed. Wanda is an edge stitch at the bottom of a sweater band. Stress makes Wanda wander: a stretch or a poke leaves her all ruffled because she has no support along the entire bottom edge: once she stretches, there are no sibling and cousin stitches among whom to distribute the stress and who can bring her into shape again. Lon is an edge stitch on a front band. Lon stretches out long when stressed, because, like Wanda, he has no support along the stretched out edge to pull him back into shape. The conclusion of the first part is that UNSUPPORTED EDGE STITCHES (Wanda and Lon) are the reason GARMENT EDGES RUFFLE and STRETCH OUT.
The second post (Why cuffs and bands are wonky, and what to do about it) suggests a cure: If you KEEP THE EDGE STITCHES OF THE FABRIC AWAY FROM THE EDGES of KNITTED GARMENTS, the edge stitches can't stretch out. In Norm, Wanda and Lon terms, keeping Wanda and Lon away from the edge means that the edges are populated by Norm-type stitches: supported on all sides, these stitches can easily recover from the stretching stresses to which garment edges are subjected.
This part of the series also laid out the easiest way of keeping the edge stitches of the fabric away from the edge stitches of the garment: a SIMPLE ROLLED STOCKINETTE EDGE.
The third part of the series discusses another method of keeping the edge stitches of the fabric away from the edge of the knitted garment, making HEMS AND FACINGS. Again, this works because the edge of the garment is actually made up of Norm-type supported stitches--the Wanda- and Lon-type edge stitches are carefully tucked in on the inside where they are simply not subjected to the stretching stresses present at the garment edge.
The fourth part discusses how to KNIT SHUT A HEM, either a rollover hem, or a hem with a fold line.
The fifth part discusses why knitting shut a hem is best on narrow tubes (socks, cuffs) but how knitted hems flip up on long seams like those at the bottom band of a sweater. The alternative to knitting shut is laid out: SEWING SHUT A HEM.
The sixth part of the series changes direction away from strategies to keep unsupported edge stitches away from the edge of garments. Instead, this post accepts that sometimes the edges of the fabric will be the edges of the garment, and talks about how to stop such fabric/garment edges from flipping and curling. This sixth post also reaches back to the prequel post about non-curling fabrics such as ribbing, moss and garter. You see, the curling and flipping problem actually arises from stockinette's severe tendencies to want to curl. Even when non-curling fabrics are attached to it, stockinette wants so desperately to curl that it simply takes the "non-curling" edge right along with it. This sixth installment shows how STEAMING AND IRONING can help persuade stockinette away from this unruly behavior.
The seventh part also deals with stockinette edged with "non-curling" fabrics: this post lays out a way to knit single-layer fabric edgings which DON'T flip and curl (or at least, which don't flip and curl as much): ZIG-ZAG BANDS. Zig zag bands solve (or at least: help solve) the curling-stockinette problem because the zig-zag pattern breaks up the fault line along which the stockinette wants to curl. The most common use for a zig-zag band is an improved method to attach a garter stitch edging to a stockinette stitch fabric, a scarf, for example, or the garter-stitch front bands of a stockinette sweater.
The eighth post in the series shows TUBULAR CAST ON for a 1x1 ribbing--a method which controls the edge of a ribbing from spreading.
The ninth part lays out the matching TUBULAR CAST OFF for 1x1 ribbing--a method which makes the exact same edge as the tubular cast on, only at the bound OFF edge.
These two posts--the tubular edge posts--really address a very specific bit of the overall wonky-band issue: the problem of controlling stretching in the very edge stitches of a ribbed fabric. Nevertheless, SO many garments are edged with an unhemmed ribbed fabric that the tubular cast-ON and tubular cast-OFF really might be the most useful posts of the whole series.
Tubular cast-on and -off are really spectacularly successful in turning "home-made" knitting into "handcrafted" goodness, and they both work because they stick a Norm-type stitch--a fully supported stitch--at the very, very edge of the ribbed fabric. In other words, we have completely eliminated Lon and Wanda type stitches, and we have turned them all into Norm-type stitches with these two nifty, nifty tricks. In the process, we have come full circle from the first posts to the last, and this is the end of "of the better cuffs and bands" series. Thank you for reading along!
One final thing: some readers have expressed interest in tubular cast ON and OFF for 2x2 ribbings (k2, p2). Although several methods are familiar to me, none are anywhere near as nice as the tubular cast on and cast off for 1x1 ribbing. I'll keep working away on this problem and will be sure to post if some new trick reveals itself.
--TECHknitter
(You have been reading TECHknitting on: "Tricks for knitting better cuffs and bands, series review and summary)
I have held off showing you some photos of Bubbles because I was hoping by now I'd be able to do some before and after photos of her weight loss. I think she has lost a little weight but we need to continue our efforts. She is still living in just one room to keep her and Jack the cat separate so she isn't getting as much exercise as I'd hoped.
She has the best bunny room filled with boxes and baskets and toys and hay and pet beds and blankets and even a stuffed bunny friend she is "grooming" here.
I like to hang out and read on the floor with her. The other night it sounded like there were about 20 coyotes howling right outside the window and I went in with her and she didn't even seem perturbed. Occasionally if I'm lucky she'll come up on my lap. She's such a sweetheart!
Knit Lab
I even got recognised!, from the "Knitted by me" Book in the window that is open on my page. I was sat there knitting and a group of people on the out side looking in saw the book and me!, it was all very funny.
(With my reference, to being an animal in a zoo. I had forgotten about the book)
The "Gino dress" which is the pink striped one was referred to as looking like something from the "Odd Molly" range!, So as you can image very flattered......Maybe I should contact them?
I also got to take a good picture of my dresses in the window as Karin L, turned them for me.
(Good luck with the interview ;-)
Publicity
Peacock Blue
There is also a possibility that I could also lace up the sides with green Ribbon.
This is the back and I think that I am going to edge it! with the green acyrlic and ladder (type) blue/green yarn as I did for the front of the nightie. I think it defiantly needs just a little bit more to set it off as the front is so detailed.