QUICKtip: check the web for errata BEFORE you cast on

(A lot of QUICKtips lately because the garden calls--I've been hoarding these short little tips up for the busy days of summer....)

ERRATA (err-ah-tah; plural noun)
Errors in printing or writing, especially such errors noted in a list of corrections and bound into a book. [Latin errātum, from neuter past participle of errāre, to stray.]

Old hands have learned this the hard way--this TECHknitting QUICKtip is for newer knitters, and was inspired by a novice knitter I overheard in my LYS last winter--asking the workers why the pattern she'd bought a few weeks earlier wasn't working. The idea that it wasn't her fault--that the pattern could be wrong--clearly shocked her.

THEN
In the old days, publishers would send out "errata notices," little strips of paper that your LYS was supposed to paste or tape into a booklet to correct the errors the publisher found out about only after the booklet was published. Similarly, when you bought a pattern book, a flurry of little errata slips often fell out as you opened the book for the first time. The publishers quaintly believed that since the error was theirs, they ought to fix it.

NOW
With the advent of the web, publishers and designers have put the onus on YOU to check their websites to see if errata have been published. It would behoove you to do that--there are pretty much no publishers immune, and magazine patterns seem particularly prone to being full of errors. Not to mention yarn company patterns.

Bottom line: check the publisher's web site for pattern errata BEFORE you cast on. Heck, check the whole web--bloggers often find problems...before publishers do...

--TECHknitter

Knee Socks

I realized that I also had some knee socks that needed new photos.


These are the Dale of Norway Lillehammer socks knit in Nature Spun sport weight. I am still kicking myself for not knitting the cool Norwegian deities on the feet. I've worn them exactly once - for cross-country skiing back when we lived in Colorado.


These asymmetrical knee socks were knit with some naturally colored wool handspun yarn I bought on Ebay. I had just heard Elizabeth Zimmermann had died so I used charts I found in one of her books.

DH has worn these for cross-country skiing although I'm not sure they are the right size. I guess I have to make some more!
I hope to get a chance this week to photograph all my hand knit sweaters. The previous photos weren't that great and I hope to improve on them and get some more shots of special details.

On the other hand, perhaps I shouldn't bother as evidenced by these less-than-wonderful photographs of you-know-who.


Knitting Travels


It is hard to tell by the picture what it actually is?
But it is in fact a crochet portable DVD player holder!.
It has a pocket on one side for the movies and the other for the battery pack. The central part for the player.

It only came in some dodgy packaging(no case and white plastic), so no protection(no adult jokes here!) so I thought I'd crochet one. Its international as I began in Sweden, did some in England at the air port and then finished the knitting part on the beach in Spain. And finally stitched it together back home in Sweden.

So my traveling Dvd now has an official traveling case.


QUICKtip: controlling extra-long cables

If you are working with an extra-long circular needle (like for "magic loop" or back and forth knitting) the trick of inserting your hand into the loops of excess cable will stop the cable from whipping around with every stitch, whacking everything around you.

This trick works very well with the newer flexible no-memory cables, such as with Addi Lace needles (illustrated). It works less well with old-fashioned nylon cables, but your seat mate on that next flight will still thank you.

(This is a 47" needle being used "magic loop" style to knit a hat.)

--TECHknitter

QUICKtip: Knots can be your friends

The ancient Incas are said to have communicated by "quipu"--knotted strings which encoded information. You too can encode information in a simple knot. If you knit a swatch on size 7 needles, 7 knots go in the tail. The next time you wonder what needles you used with that yarn--ta da! Your own personal "quipu" is hanging on the swatch waiting to tell you. If you "borrow" your best size 5 circular needles from a project and put the project on a stitch holder, 5 knots go in the tail. When you find that project languishing 6 months from now, you won't be discouraged from taking it up again by not remembering what you were doing--your 5 knots will remind you that you were knitting with size 5 needles. As is apparent, this also works with millimeter sizes BUT you must not mix millimeter and American sizes--pick one or the other.

--TECHknitter


Here's where I knit outside. I don't do it often because we have too little shade but today it wasn't too hot. I'm finishing up the second Navajo-inspired glove while drinking some herb tea. DH made these Adirondack chairs although he keeps giving them away. As you can see I don't let DH remove weeds because I love eating dandelion leaves in my salads. Plus there is the rabbit who especially enjoys the flowers.

How to count rows

Angie, a reader, (and a blogger who takes a nice photo) asks:
"How do I count the rows accurately in my active work? Do I include the cast-on row and the stitches on the needle(s) or not?"
A 2-part question gets a THREE-part answer...

1. COUNT THE CAST-ON?
Whether to count the cast-on depends on HOW you cast on.
  • If you cast on with a loop method (such as backwards loop or forwards loop) the first row you knit is the first row of the work--the loop cast-on is not usually counted as a row. (This is a convention because, if the cast-on were to be counted as a row, pattern writers would have to write a different set of instructions for the first repeat of a texture pattern counted in rows.)
  • If, however, you cast on with a long tail method, the first row is knitted at the time of the cast on. Therefore, the first row you knit (or purl) after the cast-on is actually the second row of the work. (There is a more detailed explanation in the long tail post.)
  • If you cast on with a cable method (also called "knitting on" or "chain cast on") then it's knitter's choice -- this kind of cast-on is heavier than a mere loop cast-on, but not quite doubled as is the long-tail cast on. You must make up your own mind.
click picture
This illustration came out small (another mystery of html). If you click it, though, it'll get bigger.


2. COUNT THE STITCHES ON THE NEEDLE?

As to whether to count the loops on the needle -- the answer is "yes." You do count the loops on the needle, because they are stitches which have already been knit. The confusion about this is understandable--it is the NEW stitches you are going to put INTO the loops already on the needle which is going to determine how those loops will lay--whether they will be knit stitches or purl stitches. BUT, because they have already been created and are laying on your needles, there is no question that the stitches on your needle have already been knit. Because they have been knitted, they ought to be counted, unless the directions tell you otherwise.

Now, having said all this hyper technical stuff, I can also tell you that one row more or less might make a horrible mess of a TEXTURE pattern in a fabric (such as this one, for example). BUT -- one row here or there is unlikely to make a difference in the FIT of any knitted garment. Whether you choose to follow the convention to exclude the cast-on row from your row count will not make a noticeable difference in your finished garment. What WILL make a difference in your fit is whether you are CONSISTENT in counting rows between the different parts of your project.

Example: suppose the front of your new sweater is knit to 76 rows to the underarm, NOT counting either row of a long-tail cast on as the first row, and NOT counting the stitches on the needle (in other words, not counting the red, green or blue rows of the illustration.) Now suppose the back is knit to 76 rows to the underarm. This time as part of the 76 rows, you DO count the rows you didn't before (in other words, this time, you do count the red, green and blue rows of the illustration.) The front piece would wind up 3 rows longer than the back. This will make for awkwardness when it comes to seaming up.

Bottom line: There is a convention for which rows to count as part of the row count. However, to achieve a good fit, CONSISTENCY in counting is the most important thing--much more important than whether you choose to follow the convention.

3. ADDENDUM:
Even though it's not part of Angie's question, the title may have readers wondering a different question. Many knitters ask: "If you want to keep track of rows as you knit them, what's the best way?"

There are lots of ways to keep track of your rows as you go--clickers of various sorts are popular, I often use the little green kind that hangs around the neck. Also popular is that hardy perennial--pencil and paper. Some knitters make hash marks on a blank page, some make Excel spreadsheets with little boxes to check off. As to the question of whether the row should be noted BEFORE starting or AFTER finishing, this is a dispute into which I will not go. As long as you are (say it with me now) CONSISTENT in your approach, it makes no difference whether you mark the row before you start or after you end.

Whatever way you keep track, however, the one certainty is that you will lose track. The phone will ring, or your kid will crash into something, or your city council rep will ring the bell to explain why she should be re-elected as you stand there wishing you'd brushed your teeth after that cheese-and-pickle sandwich. All of this is a long-winded way of saying that "reading" the fabric, as Angie wants to do, is your best insurance policy.

Have a safe Memorial Day weekend, and drive carefully!
--TECHknitter
(You have been reading TECHknitting on: How to count rows)

Here is my latest glove-in-progress. (Yes, I'm aware that I can't seem to stop knitting gloves.) I used the design on a friend's Navajo rug for the chart inspiration and 6 colors of Palette. I think I'm going to add fringe on one side of the gauntlet cuff and possibly a duplicate stitch design on the back of the hand to add to the western theme.
BTW, if you look hard you can see Peaches the rabbit snoozing in her pet bed under the green table.

~some summer wardrobe sewing~

Quite a while ago I posted about this tunic I hoped to make. It is a Japanese pattern, which I was hoping to decipher...

After a lot of metric to inches converting I came up with a pattern and made a couple versions out of an old cotton sheet. This is what I finally ended up with...


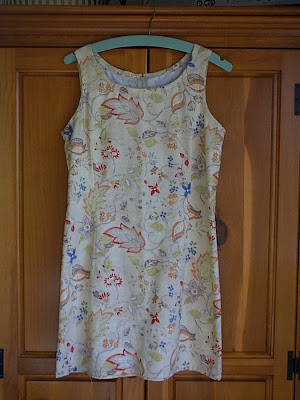
It's still not perfect~ not sure if the darts are just right ~ but it's good enough. And thrifty as well~the Tracy Porter fabric was off the clearance rack. Now, to find some linen for a pair of capris to go with it.

I've also finished this skirt ~ casual for summer and super easy. It's Simplicity 7229...

I still have a linen dress to make, a top to finish, a summer sweater I'm knitting, and those pajamas...oh, and a pair of drawstring gauze pants for Steph. Yes...I've bitten off more than I can chew...we'll see how far I get.

A very nearly invisible increase

Here is an increase which is as invisible as any increase can well be--the sort of increase you would do in the middle of a field of stockinette, should you ever need to do such a thing.
Step 1 (above): The green stitch is the next stitch on the left needle, the red stitch is the stitch under that. The blue yarn is the yarn of the current row--called the running yarn.
* * *
Step 2 (above): Insert the head of the right needle into the red stitch as shown.
* * *


Step 3 (above): Place the head of the red stitch on the left needle--arrange it untwisted, with the right arm forward.
* * *
Step 4 (above): With the running yarn (blue) knit the red stitch AND the green stitch.

That's it. Neat, huh?

--TECHknitter

PS:  There has been some confusion between the nearly invisible increase which ADDS a stitch to your fabric (this post above) and "knitting into the stitch below" which is a knitting trick to make a thick and puffy fabric but which does NOT ADD a stitch.  It is true that both of these techniques involve the stitch below, but they are not the same thing and confusing one for the other will cause no end of problems in trying to follow a pattern!
(You have been reading TECHknitting on: Invisible increases)


I spent the weekend giving up on things.

1. I gave up on the Fendi knock-off gloves I was knitting (on the left). Other than the cuff they just bored me silly and I couldn't figure out how to add more colorwork to keep my interest. I guess I need more color as well. So I've given up. I may use the chart again for another project.

2. The wonderful Selbustrikk cover mittens. The problem is that I can't find a single man who will wear these. They are going to be larger than the hands of the one guy I hoped they'd fit and I can't find another guy who would wear these mittens. I'll continue to see if I can find someone else to give them to.

3. My new Pony Pearls 5.75" metal reinforced dpns in sizes 2.25 and 2.75 mm. I bought these because the Inox/Prym glove needles I usually buy don't come in every size. Unfortunately these particular plastic-coated dpns have the worst tips ever - they are rough and coarse and constantly catch on or split the yarn. I will stick to using 7" dpns in that size no matter how clumsy they are for glove fingers. (I break bamboo and wood dpns in that size.) I may try to sand the tips to make them work better.

~a cushion cover & a tote~


A couple years ago Mike built me this bench from an old maple bed frame. We found the bed for $5 at a yard sale and decided it would be a fun project; we had seen these benches around at various shops. Well, I used it for awhile, then it was relegated to the basement. The cushion wasn't thick enough and I really didn't like the fabric I had used. The other day I brought the bench back upstairs and added two inches of foam to the cushion. I made a new cover out of some of this 'Seaside Rose' fabric and for now it is sitting in the dining room...

And I finished up a new tote bag for the shop. I have been in the mood to work with linen, so I used some in natural and combined it with more of that red and white vintage fabric~remember the apron?...

The weekend was a bit chilly, but it was good weather to get out and do some gardening and I was in the mood, so I weeded, mulched, planted seeds, and divided some ladys mantle.

Hope your weekend was good!

QUICKTIP: 2 kinds of sewing needles

After watching various knitters over the past several weeks stuggling to sew seams, or to work in ends, here's a TECHknitting QUICKTIP.

There are two kinds of long-eyed sewing needles which knitters are likely to meet: dull and sharp. The smaller dull ones are properly called "tapestry" needles and the larger dull ones are called "darners," while the sharp ones in all sizes are called "embroidery" or "crewel" needles.

Dull needles are used when you don't want to pierce your yarn, such as when you want to seam together the pieces of a sweater, or create duplicate stitch embroidery on the surface of a knitted fabric. LaurieM (a reader of this blog) points out in the comments that dull needles are also best for the kind of Kitchener stitch done with a sewing needle. (Thanks LaurieM!) Sharp needles are used when you do want to pierce your yarn, such as when you want to work in ends, or embroider through a thickness of knitted fabric.

Using the wrong kind of needle for the wrong kind of work will only slow things down and make you unhappy.

--TECHknitter

~vintage sewing patterns~

On a recent visit to the thrift store, I ran across a couple boxes of old patterns. I came away with small box worth for just a couple dollars.
I like this dress, but what do you think about that collar?...

This one has some notes written on it dated 3/1972, though I'm sure a 25 cent pattern of this style must have been from a much earlier time...

This one appears to have been nesting material for a mouse family, I'm assuming by the tiny chew marks. It's a shame because the pattern doesn't seem to have been used. I'm optimistic that maybe I can salvage it...

Sixties maybe? I like the black and white version on the left with the little collar...

This pajama pattern was an Ebay purchase...

I thought these would be fun to make since I would really like some new summer pajamas ~ if I can get to it before summer is over.

If you have any interest in vintage patterns, here are some sites I found:

Patterns from the Past

Acme Notions Vintage Patterns

Lanetz Living

The eVintage Society

Out of the Ashes Collectibles


I promise to post pictures soon of some sewing projects I have actually finished :)

Peace Gloves

I finally finished the second Peace Glove knit in Palette and 2.5 and 2.25 mm dpns. I made them to match the denim jacket I embroidered. I plan to make gloves to wear with each of my coats and jackets so I have two more pairs planned. Sorry about the photos but I had to use the flash as it has been gray and rainy here this week.


Today I sent $204.83 from booklet and pattern sales to the Colorado House Rabbit Society. Also, the lime green and purple socks are on hold because I can't find the right color of purple. This was hard for me to believe because I have a whole container of purple yarns. Instead I started another pair of gloves.

Multi color knitting, 1 color at a time: slipped stitch patterns

We've already talked some about multi-color knitting created one color at a time--a kind of knitting called multiple pass knitting. Now we're turning to the second category of one-color-at-a-time color knitting--SLIPPED STITCH patterns.

Slipped stitch patterns come in two flavors. First, simple slipped stitch. This kind mostly has a certain amount of contrast color and generous amount of the main color. The second kind are more complex patterns, often called "mosaic knitting." Complex patterns generally have roughly equal amounts of both colors.
click picture

SIMPLE SLIPPED STITCH color knitting:

A couple of decades ago, my mom made a multi-colored vest. While gearing up to write this series on color knitting, I dug it out. Mom never learned to knit with two colors at the same time, so I was curious how she'd made it. Looking carefully, that vest was made using a slip-stitch pattern--stitches from the row below (and sometimes, 2 rows below) were slipped up into the current row and left there. This created rows with two colors, although only one color was ever knitted at a time.

Below is a charted example: in this chart, row 4 is to be made by knitting the stitches shown in blue, and slipping the pink stitches indicated by the red arrows.
click picture
Step 1 of this technique involves first knitting a blue stitch, then slipping a pink stitch, then knitting a blue stitch, and so on, down the line. This is the result on the needle: the slipped pink stitches are marked with a red dot. (Below.)
click picture
Step 2: On the following row (row 5) all the stitches, both pink slipped and blue unslipped, are simply knitted. The slipped pink stitches (marked by a red dot) remain in the fabric in their slipped positions. (Below.)
click picture

* * *
Simple slipped stitch patterns are probably the easiest of all methods for creating colored knitting. However, they are not to be scorned on that account. As the French philosopher Descartes implied (commentary to his third rule) when something is fine just as it is -- simple and evident -- it need not be wrapped in complications to make it seem more desirable and important.

See for yourself: this illustrations shows an extremely simple slipped stitch pattern; next to it is the quite gorgeous fabric which results.

Diagrams and instructions for all kinds of simple slipped stitch patterns are written up in pretty much any knitted fabric pattern book. However, because slipping stitches distorts the fabric (bunch it up, lengthwise) these fabrics are denser than regular one-color knitting -- sometimes a LOT denser. So, take that into account before you get seduced by the pattern book's riches.

One more thing to take into account: if you want to make two color slipped stitch fabrics working back-and-forth, it will sometimes happen that your two colors of yarn will wind up on opposite edges of the fabric. This is more of a surprise than a problem--the solution is laid out in the green paragraphs about "out of phase yarns" in this post (scroll down for the green text).

COMPLEX SLIPPED STITCH color knitting:
The simple slipped stitch fabrics illustrated above generally involve slipping a few contrast stitches over a ground of main color. Complex slipped stitch patterns are made the same way--by slipping stitches of one color on the first pass, or the first several passes, then knitting these slipped stitches on a future row. However complex patterns differ from simple patterns:
  • they are generally geometric
  • they generally feature rather equal amounts of both colors
  • the stitches are more frequently (but not always) slipped over more than one row.
Complex slipped stitch patterns knitted in motifs are often called "mosaic knitting" and their most famous proponent is Barbara Walker. Ms. Walker's book by that name was recently re-issued by Schoolhouse Press, a service to knitters everywhere.

Mosaic knitting--whether in motifs or in all-over fabric--creates a firm, not very stretchy fabric, more like fabric woven on a loom than fabric created with knitting needles. (This is because the high number of slipped stitches take most of the "reserve" out of the normally loopy knitted stitches--for more information on how knitted fabric works, follow this link.)

All-over mosaic fabrics; heck, any mosaics, have a retro look. They are rather thick and heavy -- best for outerwear or sleeveless garments. How 'bout this dapper gent's vest pattern from Vintage Purls? (VP, posting from Kiwiland--New Zealand --collects vintage patterns and puts them on the web for free. Thanks VP!) How 'bout those colors in the fabric sample knitted from the pattern? Do they scream 70's appliances to you? Me too.

Sock patterns are sometimes written in mosaic patterns, but even if made up in thin yarn, such socks would be heavy and inflexible--possibly better for hiking than for dress up.

--TECHknitter (You have been reading TECHknitting on: Slipped stitch color knitting)

Sandia Hike

I should finish the second Peace glove tonight during the Red Sox/Tigers game. Then I have two more glove designs I want to start along with some socks in purple and lime green.

Here are some photos from a walk we took this weekend on a horse trail in the Sandias.


Solar-powered outhouses.


Words of Wisdom


Detail of alligator juniper


Cholla cactus - these have gorgeous hot pink blooms.

Knit Cafe


Every Tuesday I go to a knit cafe (Well I try, more like every other) At Gino's cafe in Stockholm. Each week there are always new members, people on their holiday just passing through and always some of the regulars.
They don't mind that my daughter (who has to tag alone if Dad works late) and I don't speak Swedish. My daughter tells me whats going on, as she can speak and understand quite a bit. The regular members are happy to chat in English.
This week a reporter came who writing for Afton Blandet (That is badly spelt Swedish, my apology's) The article about knitting and it's relaxing property's.
So we had our photos taken by an extremely handsome photographer and I hope they just put Monet's in the paper because my knitting went completely wrong and she stole the show with her portable knit machine that she had brought alone. My purl 2 knit 2 ......whilst I was trying to be cool calm and collected and not blush too much. As I was actually thinking about how cute the photographer was and not knit, purl!.
Yet another funny knit experience I wanted to share.

Crochet

Crochet commissions

I think this is the third that I have crocheted using the fire fly Ribbon yarn(Emma!:-), it's silky slippy and does not get any easier, but I love the finish. It looks like an expensive scarf, that will go well with any outfit.

Monet's Creative corner.


My daughter has yet again followed in her mums foot steps and using her kiddies knit machine has managed to create this great little dress for her TY babies.

She really is a chip of the (not so old!) block.....

Twins


Think that's its time to give up on the baby hat phase. I managed two small beany's (OK for boys!)

But the trouble is that they are going to be for 'to term' twins not prem one's so!!!

Back to the drawing board! I figured they would look just as good on twin teddies, I just need to find the right size.

~in the garden~

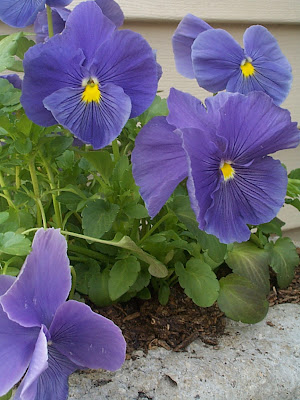
It's a sultry day here for May~warm, breezy, & humid~thunderstorms this morning, but now sunny~ so I went out to do some gardening & cut some lilacs. I had to get some pictures because I love all the purple, blue, & violet colors ...
And lilacs are probably my favorite flower of all. My lilac bush was taken from part of my late grandmother's before her house was sold; dug up for me by my dad. Grandma's lilac bush had moved with her at least three times over her married life. Sadly her huge old bush was chopped down by the new homeowners, so I feel very fortunate that a bit of it lives on for me to enjoy.
I cut a bouquet for the kitchen...
...and they smell heavenly!