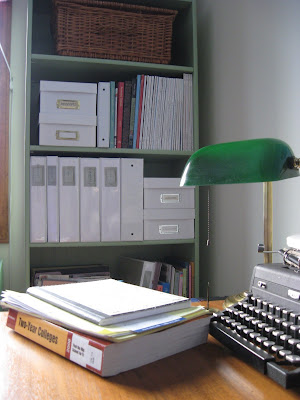
packing my bags...
Knitlab/ Laboratory gets new speciamen!
Yet another experiment, a complete jumble of technique style and yarn. If the litmus paper was dipped this specimen would be high on the alkali.;-)
I am a bit surprised that not much has changed for me in 6 years. I went back and read my very first posts from January 2003 and we are still living in the same tiny passive-solar house with rabbit and cat companions (same cat, different rabbit), and I am knitting a Dale of Norway sweater just like I was back then.
My progress on the Dale Whistler sweater so far is pathetic but here it is anyway.
The sleeve cuffs have interior ribbing - I just used some scrap yarn for that purpose.
Here's my latest super macro photo of a begonia. I have always grown African violets indoors and I have one geranium that does great inside but I wasn't aware I could grow begonias inside until a few months ago when I bought a plant at Home Depot. This spring I'm going to get more flowering plants for indoors as I love having flowers all over the house.
Yarnbomb (small scale)
Yarnbombing on a small scale and it is my 1st attempt at this newly named knit sport.
The handle of my Broken Blankie Blanket Basket seemed a good choice to practice on.
Carnival Karolinski
Side on view in my window, I like my little star lights, they set of the skirt. Ready for any show set or even the stage performance!
Complicated? completed...... the front is a medley of clashing colour/ that make the eye believe that they do all really blend.
When really they do not Black pink blue? It's just something that's particularly cool with a good knit and crochet project, it's really hard to make any thing that will not blend together, once those stitches entwine.
Magic
I think that I need to increase its title as I think that it would probably be an excellent if a little cold outfit for the Notting Hill Carnival.
Playful Stripes Cardigan
I chose the name "Playful Stripes" for this sweater because I love the way the colors "play" together in the stripes. It's interesting because the color brown can look one way next to pink and take on an entirely new hue and identity paired with green. It was fun to pair up and play with all of the colors as I was striping the yoke. I also like how the reverse side of garter st splits the colors up.
Did you know that 3 year olds make for extremely high maintenance models?
This photo shoot turned quickly from this...
To this.... in under 5 minutes.
I'm hungry AND I have to go potty!!!
SIZES AVAILABLE:
3 months [6mos, 9mos, 12mos, 2, 3, 4, 5, 6] (shown in size 3)
FINISHED MEASUREMENTS:
Chest: 18 [19, 20, 22, 23, 25, 26, 27, 28] inches
Length: approx 9 [9.5, 10.5, 11.5, 12.5, 13.5, 14.5, 15.5, 16.5] inches after blocking
GAUGE:
24 sts/36 rows = 4" in stockinette stitch on size 4 needles
To all of you knitters who are morally against finishing work: This sweater is constructed in a way that requires minimal seaming. The only seam that needs to be sewn up in the end is the sleeves. The sleeves could easily be modified to work in the round, but I found for myself it was easiest to knit them flat because of the striped border on the cuff.
Ordinary chain bind off, part 2b: binding off in the middle of a fabric--ending the bind off
The last post was about starting a chain bind off in the middle of a fabric. This post is about ending the chain bind off.
At the end of your bind off for a pocket or a neck opening, you may often find that the last stitch looks messy. This is because the traditional method of ending a chain bind off in the middle of a fabric is to work the last stitch by the same method as you have made the intermediate stitches. Per illustration 1, at the red arrow, this results in the passed-over bar of the last bound off loop showing on the face of the fabric.
Let's diagram this bind off, so we can analyze the stitches one-by-one.
- the second to the last stitch of the bind-off is illustrated in BLUE
- the last stitch of the bind off (also called the final stitch of the bind off) is illustrated in GREEN
- the first stitch made in the fabric just past the left end of the bound-off opening is illustrated in PURPLE
- The stitch in the row below the first fabric stitch is illustrated in BLACK.
As we saw in the photo in illustration 1, and as repeated by the red arrow in illustration 2, with the traditional bind off, the passed-over loop of the last (green) bind-off stitch lays over the first (purple) fabric stitch. This bound-off loop interrupts the smooth march of the column in which the purple stitch lies, and that interruption is what makes the left edge of the bind off look so sloppy.
Our mission today is to get rid of that interruption. We'll smooth off the left edge all neat and tidy, so that the purple stitch lies in an uninterrupted column of stitches. We are going to reach this goal by using a combination of k2tog and a pull-up of a stitch from the row below to eliminate the passed-over bar.
a: Bind off until you are at the second-to-last stitch (blue)
b: Do NOT knit the final stitch (green) to be bound off. Instead, pull the green stitch up onto the right needle--this is the pull-up of the stitch from the row below discussed above.
c. Pass the blue stitch over the green stitch as if you were doing an ordinary bind off, but hold the running yarn in the back when you do it. This passes the loop of the blue stitch, which has already been knitted, over the loop of the green stitch, which is not yet knitted.
d: Return the final (green) stitch to the left needle, so it lays just to the right of the black stitch.
e: knit the black stitch together with the green stitch (k2tog). The illustration shows the result after you've k2tog'd the green and the black stitch: the k2tog arranges the black stitch on top, while the green stitch is hidden behind, and the first fabric stitch past the bind off--the purple stitch--has no bar laying over it. In other words, the bar lays over the green stitch, and that green stitch AND the bar are hiding behind the black stitch, instead of laying over the purple stitch! Neat, huh?
OPTIONAL: The illustration above shows the final (green) stitch simply knitted together with the black stitch. However, as an optional additional step, if you find that the green stitch is so loose that bits of it keep popping out from behind the black stitch, you can tighten it by twisting it a couple of times before you return it to the left needle in step d.
illustration 3 is a photograph showing what this bind-off ending looks like in real life, in all-green yarn.
As shown by the red arrow, the column in which the final stitch lays is not interrupted by the bar of the final stitches' bind off, because we have hidden that last bar. Our goal of a tidy and uninterrupted column for the first fabric stitch has been met.
Ordinary chain bind off, part 1: binding off along a straight edge
Part 2a: binding off in the middle of a fabric--starting the bind off
Part 3: binding off circular knits.
This week I have been mostley crocheting!
The top of the two piece I am currently sowing in all the ends and I have to add the five button holes that attach it to the skirt, using the chartreuse
(Sitting on top of the pink basket)
Brought from Stockholm knitting fair.
Currently knit thinking about.............
Yarnbombing (Example The Crochet Mexican Bus)
I need to yarnbomb something, but what?
This pattern was part of the Knitlist gift pattern exchange years ago but it has become popular on Ravelry so I thought I'd write it up here in more detail with photos.
Copyright 2009, Nanette Blanchard. All rights reserved.
This balaclava/ski mask is excellent for cold weather and can even be worn under another hat. It keeps your neck warm and can be worn several different ways - above the chin, below the chin, above the mouth or with the neck rolled up for a cap with a brim. I've made it in wool, a wool blend, and 100% acrylic for those who don't want wool rubbing against their face.
MATERIALS: 1 skein of Cascade 220 100% Peruvian Highland wool worsted weight yarn (100 grams/220 yards) in color 9447 (a dark heathered spruce green color)
One row marker
Size 7 (US)/4.5 mm and Size 8 (US)/5.0 mm double pointed needless (You can also use size 7 and 8 circular needles, 12", for all the ribbing but you'll still need the size 8 dpns for the top decreases.)
Tapestry needle for weaving in ends
GAUGE: 6 sts = 1 inch, 6 rows = 1 inch over unstretched K2, P2 ribbing. To save time, take time to check gauge.
FINISHED SIZE: Men's Medium or Women's Large
With size 8 (US)/5.0 mm dpns or circ, loosely cast on 92 stitches and insert row marker at end of row. Join, being careful not to twist.
Work in K2, P2 ribbing for 3 inches. Change to size 7 (US)/4.5 mm dpns or circ, and continue working K2, P2 ribbing for 4 1/2 more inches (your knitting is now a total of 7 1/2 inches long). Note: The neck length is variable depending on the wearer - I usually do a slightly shorter neck as seen in the above photo for women's balaclavas.
FACE OPENING: Start the next row by working in K2, P2 ribbing for 30 stitches, bind off the next 31 stitches, continue working in ribbing over last 31 stitches of row. On next row, work 31 stitches in established ribbing, loosely cast on 31 stitches over the bound off stitches of the previous row using backwards loop cast on, and continue in ribbing.
The above photo shows the cast off edge in the front, and the newly cast on edge on the front dpn rejoined with the other sts.
Make sure you once again have 92 stitches and continue knitting in the round in K2, P2 ribbing until the whole piece measures 12 inches long. Now you're ready to discontinue the ribbing and begin the top of the head decreases.
Change to the size 8 (US)/5.0 mm dpns. K 1 row even. Knit next row decreasing 4 stitches evenly spaced across row (88 sts).
FIRST DECREASE ROW: *K2TOG, K9, rep from * across row. (80 sts)
SECOND DECREASE ROW: *K2TOG, K8, rep from * across row. (72 sts)
THIRD DECREASE ROW: *K2TOG, K7, rep from * across row. (64 sts)
Continue decreasing in this matter having 1 less stitch between decreases until 24 stitches remain. K2tog next row. (12 sts.)
K3TOG across next row. 4 stitches will remain. Cut yarn. With a tapestry needle, draw yarn end through remaining 4 stitches and pull tightly. Secure yarn ends to wrong side of balaclava.
This photo shows the man's version with the neck length specified in the pattern. This balaclava was knit in acrylic yarn and is over 10 years old.
My Yarn Stash 2009
I am still trying to figure out how to deal with our high altitude desert sunlight. I am probably the only person on the planet who regularly manages to take overexposed photos indoors. (Sections of overexposed photo will flash on the photo playback feature of this camera.)
Here's my entire yarn stash (3 armoire drawers and 2 bins) other than the Cascade 220 I previously showed you in the bookshelf. This is a photo without any color manipulation.
This photo shows the "Vivid" feature which I definitely like although some colors are still not showing up properly. For instance the bottom right red skeins are much more faded in the photo than in real life.
Here is the "Neutral" color setting which seems to just wash everything out.
The top drawer contains my Palette yarn (the plastic bag on the left contains all the great colors of Palette that were discontinued last summer - sigh) along with my alpaca collection and a few rogue skeins like Gloss and some eco-friendly yarns I bought last summer.
The middle drawer contains all my other worsted weigh yarns - Peruvian Highland Wool and Wool of the Andes.
The bottom drawer contains my sport weight yarns. I am slowly transitioning to a new all-purpose sport weight yarn (Peruvian Highland Wool sport weight) but I also have some very old Nature Spun, Telemark, and Merino Style. The big bag contains the Peruvian Highland sport yarn for the Dale of Norway ski sweater I'm currently knitting.
The container on the bottom left contains my sock yarns. I haven't bought sock yarn in years (ever since manufacturers stopped offering a good selection of solid colors) but I have some Froehlich Blauband, Stahl, Regia, and Essential. I also scored quite a bit of ultra-bright Kroy as it was being discontinued.
The container on the bottom right is a vintage long-gone yarn so I carefully save it and use it sparingly. It is Brunswick's Nylamb Sock and Baby yarn and I just love its softness, durability and elasticity.
New Podcast Schedule
Knit Cafe Sunday
My Cool Vogue Buttons that where a Christmas gift
(Thanks Lisa)
Sit very nicely on my skirt waist band, so that it can be joined actually onto the top.
If you like, or not if you prefer loose!
Yet more ruffles the aim was three rows so not the bottom cover is complete. I finished the last row at knit lab Sunday.
I just need to add some free-form panels to make the skirt a wearable in public length;-)
My current knitting new's
My You tube that's "Alison Friday on Swedish TV?"
(Something like that!)
Rich uploaded it, Any way ,what was I saying.......ah yes
He/Rich informed me, that it has had over 500 hits!
Completely shocking;-)
Yet how very cool, yet embarrassing at the same time, my pretend posh British!
I was just so nervous its my Mothers phone voice as we say in the Uk, not at all like me.
Mexico and a Crocheted Bus!
So I did a Google hit and this is what I found!
The knitting World just gets cooler and cooler.
a bit of the day
I've had this yarn leftover...not even sure what exactly it is, but I knew it would be perfect for the chunky knit beanie.
It also has a super macro setting so I can take photos of juniper berries:
and Jack's paws:
I'm working on a pair of men's mittens in Cascade 220 for the upcoming mitten booklet (ETA: the end of February). I should have used the Colors My Way setting for this photo actually since the colors are faded:
I just had to take a super macro shot of the colorwork and braid on the cuff:
sewing pouches
KNIT LAB (A whole window of me-ness!)
Inside out dress!
My baby chair (An oop's no canvas moment)
Knit lab- Rosenlundsgatan
I made the entire window display so Im very proud and although I don't sell (yet!)
"One day I will"
At the moment I just pleased with the amount of people that stop to look.
It just makes me want to brag about it;-).
I'm very pleased with my creations.