click picture

Q: What is provisional casting on? A: It is a casting-on designed to be taken out.
Q: When do you use it? A: Long story short: when you want to start in the middle of your knitting, and add the finishing touches later, you start with a provisional casting-on.
Q: Example? A: Let's say you want a white sweater with a blue border. You have the white yarn, but the blue yarn is still coming by mail, and you are IMPATIENT to start RIGHT NOW! With provisional casting-on, no need to wait, cast on the white provisionally. Once the white part's done, you'd pull out the provisional casting-on and there would be a series of loops waiting for you to pick up and add the border AFTER the sweater was finished.
Q: Another example?
A: let's say you're making a lace scarf with a directional stitch pattern. A scarf started at one end and worked to the other would have two different-looking ends. To get both ends the same, cast-on provisionally and work the scarf from the middle up to one end, and bind off. Pull out the provisional casting on, pick up the loops, and now work the scarf from the middle down to the other end. Voila; a scarf with two matching ends. (Confession #1: it's not quite as simple as all that, because there are going to be one fewer loops working down than working up. There are tricks to get around this problem, and they can be found in the post of December 7, 2008, click here.)
Q: Provisional cast on seems like a lot of trouble--is there another way? Yup, I think so. I myself hardly ever use a provisional cast-on. Instead, using waste yarn, I make a regular cast-on and knit a couple of extra rows. Next, I switch to the "real" yarn. When done, I snip one stitch of waste yarn, ravel it out, and there are loops of real yarn waiting to be picked up. These loops are nice to work with because they're tensioned perfectly to the fabric. In other words, because the real yarn loops come from a couple of rows into the fabric, they aren't distorted by the casting-on. (Confession #2: actually, I usually don't even bother with the waste yarn. I cast on in real yarn and knit a two extra rows, later raveling these out to get at the loops on the third row.) However, this post is supposed to be about provisional casting on, and you might as well know how to do it, so here's the--
HOW TO
I think the very best provisional cast on is made with a crocheted edge. Some instructions have you crochet the edge right onto the knitting needle. That IS very clever and a fine idea. However, it is awfully slow. A much quicker way, I think, is to create a crocheted chain, then pick up the loops afterwards. So, the first step is to create the crocheted chain.
click picture
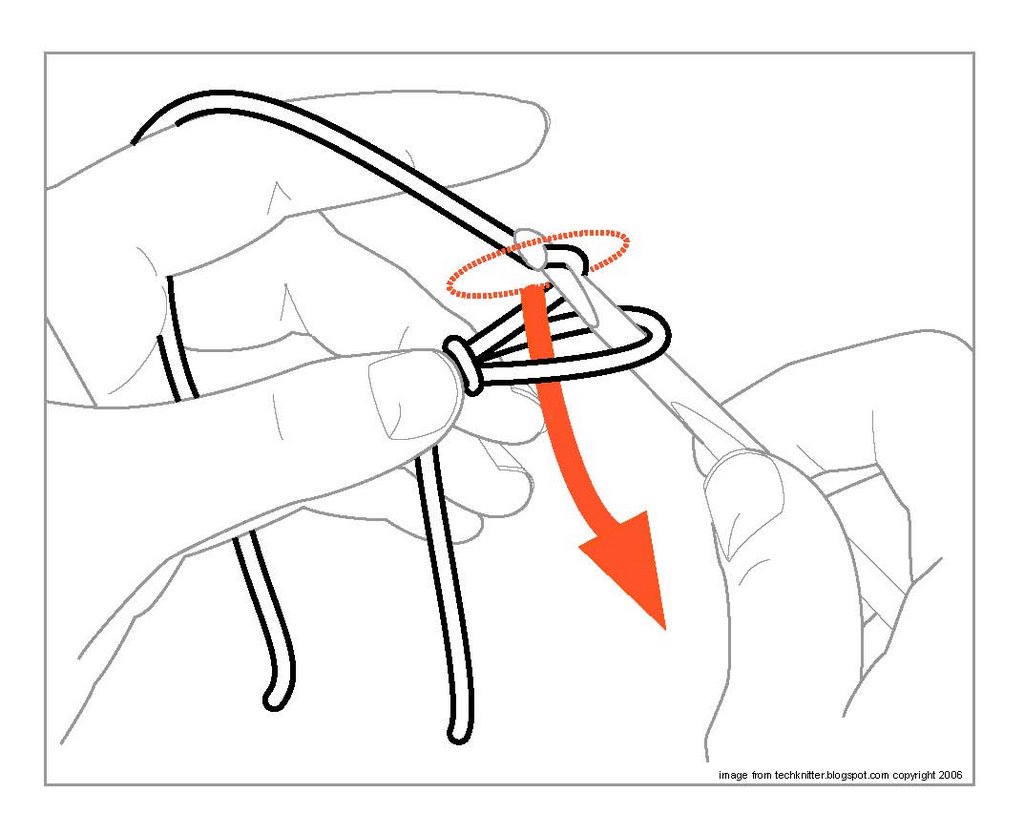
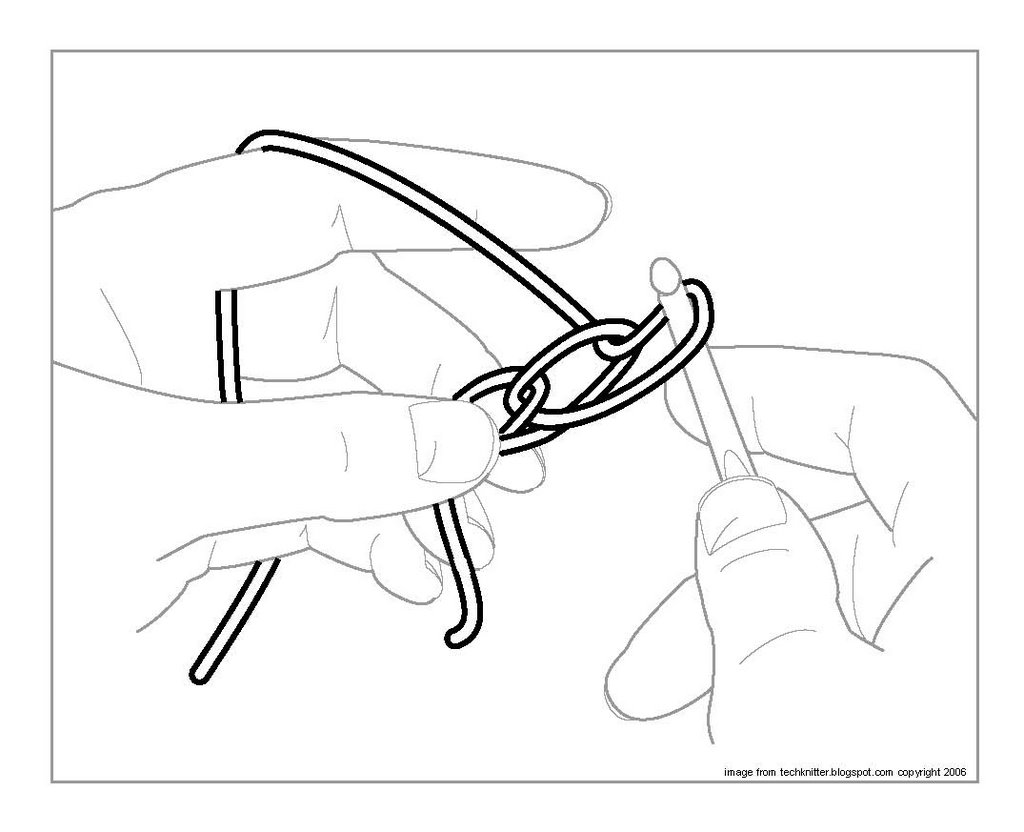
Make a slip knot and insert your crochet hook. Continue on with the hook, catching the standing yarn "up from under," then draw it through the slip knot (picture above). Once the new loop is on your crochet hook, continue to catch the standing yarn in the same manner and pull it through the previous stitch. This will make a "chain" (picture below).
click picture
After you have the crocheted chain, you have to slide the correct loop of that chain onto your knitting needle. It's fairly easy to do, but it's also fairly easy to make a mistake and catch the wrong loop. If you do catch the wrong loop, the provisional casting-on won't "unzip." That's actually an easy problem to fix with a quick snip from a pair of SHARP emboidery scissiors (cut the provisional cast-on of course, not the first row of loops). But if you want to be able to "unzip" with the pros, read on.
WHICH LOOP?
The illustration at the top of this post is "anatomically correct." But it really isn't a lot of help to show which loop of the crocheted chain to catch with your knitting needle, because crocheting doesn't really *look* like my illustration until you've stared at it and spent several hours trying to draw it. So, let's leave the anatomical illustration for the record, and take a more conceptual look at what your eye will *see* when you contemplate a crocheted chain.From the front, crocheted chain *looks* deceptively like a single column of knitting.
click picture
 From the back, you can see that a crocheted chain does NOT look like knitting--it has "bumps." Slide your knitting needle under the bumps as shown by the arrows.
click picture
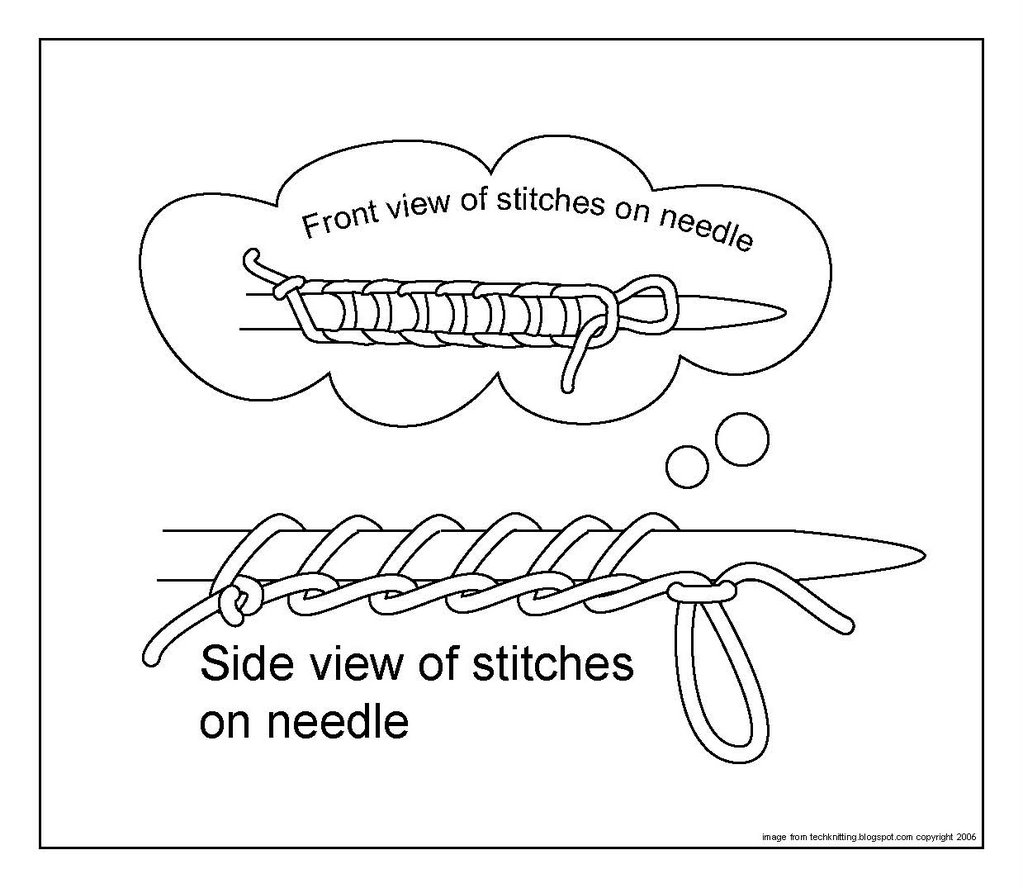
 The result should be loops on your needle, ready to knit up, which look like this:
click picture
When your knitting is finished, "unzip" the provisional casting-on by pulling on the open loop at the end of the chain, and there will be a set of "live loops" waiting to be knit in some other direction.
Final note
All my illustrations show the "last loops" dangling. Your intelligence will tell you that if you really leave them that way, your provisional knitting will unravel far sooner than you want it to. Therefore, tuck the loose end into the open loop and snug the loop up. When you're ready to unzip, pick the loose end out of the loop, and you'll be on your way.--Techknitter