Showing posts sorted by relevance for query Leaves Sweater. Sort by date Show all posts

Leaves Sweater

Well.... here it is... my crocheted Leaves Sweater.

It is not my favorite sweater that I have made but I think that it turned out okay. I could have picked a size smaller and gotten rid of some of the boxy look. But it could be worse.


This sweater was crocheted from the book Crochet Me. The design is by Annette Petavy. What I like about this sweater design is the construction. The waist shaping and set in sleeves are very uncommon in the crochet designs of previous decades. It makes the sweater fit much more like a knitted garment. The other nice thing about this design as well as the others in the book, is that the pattern calls for a larger hook size and a small yarn weight. This produces a lighter fabric and better drape. Crochet is usually so stiff!

This sweater has been heavily modified. If you will notice there are no leaves in this Leaves Sweater. The pattern calls for leaf like thingys hanging down from the hem. I liked them in the pictures but when I started crocheting them onto my sweater I decided that it looked entirely too "Peter Pan-ish" especially with this color green.

I also added 2-3 inches in length to the body and the sleeves, and didn't sew on any seed beads as the pattern called for.

Unfortunately this pattern really gave me trouble. It was riddled with errors. Hopefully there are corrections posted. Usually I am happy to post corrections to the patterns that I knit or, in this case crochet, but this had so many that I gave up trying to keep track. Also in my opinion the pattern was poorly written. Some parts were explained in perfect detail while other areas were vague. There are no stitch counts provided for you to check your work and that bothers me. I hate to complain so much because I know how difficult it is to write a pattern, but I feel that I should give fair warning to those who are interested in this design.

I am very comfortable with crochet so I was able to work out these issues. If you are experienced with crochet this is also a doable project for you. The design I think is very cute.


The other change that I made is on the sleeves. I mimicked the bottom border pattern so that it would match the sweater. I really like the edging pattern and I would use it again on a future crochet project. Whenever I get around to that.


Too many projects! Too little time!

This week has been pretty good. I do finishing work for customers, and this week I got two things seamed up. I've also made some progress on my knitting projects but it is a little hard to tell because I have five going at once and I've been working on them equally. So they are growing slowly. I have decided that I am not liking this "five projects at once" thing. It is starting to feel overwhelming. I think I ended up starting so many because they are all sweaters, and none have a real deadline because they are all for me or for Ava. As we all know with sweaters, they can take a while and they get boring, so I just couldn't help but start more and more.

Here is what I have going right now:


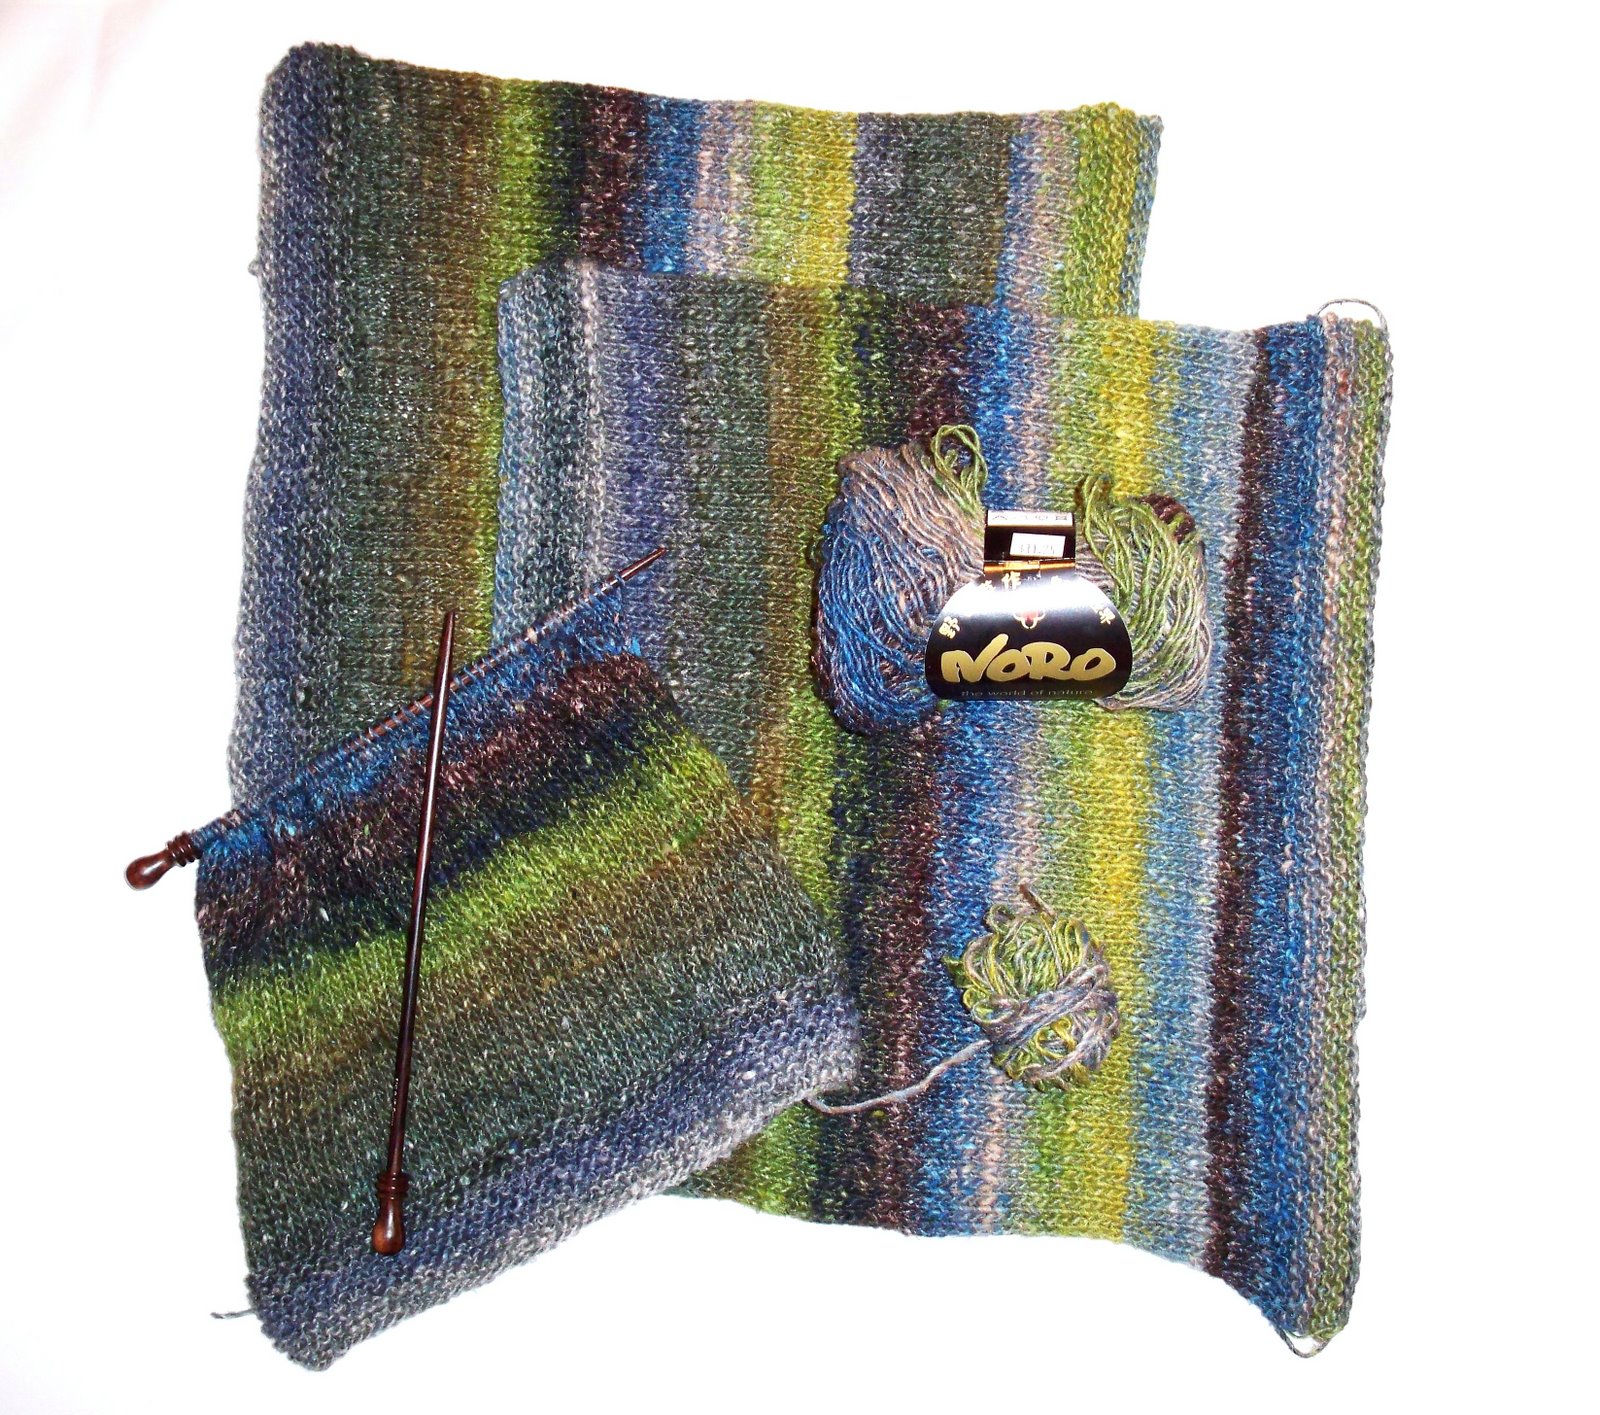
Project #1 The Klaralund Sweater from Cornelia Tuttle Hamilton Book 2: made with Noro Silk Garden

I like this sweater because there is hardly any shaping so it is really easy to knit. I hate this sweater because it has hardly any shaping so it will probably be entirely unflattering. Obviously I didn't think that one through. To add insult to injury I am stupidly making a size too small. I've thought about frogging the whole thing but I just can't bear to see all that work gone to waste. I'm going to finish it, stretch and block the heck out of it, and hope for the best.

Project #2: Leaves Sweater from Crochet Me: made with Debbie Bliss Baby Cashmerino

I've changed the pattern a bit for this sweater. The pattern calls for leaves hanging down on the bottom. I chose to go leaf less because in this color I thought it would make me look like Peter Pan. I think the bottom border looks just as good without. When I saw the book I just had to start this project right away. Before seeing it, I could never remember seeing a crocheted adult sweater that I actually would wear! It was also so much fun to do a little crochet. I started on crochet years back and haven't done much since I began knitting. This sweater has made me remember what I like about crochet. It is so easy to fix mistakes! No such thing as a dropped stitch! This pattern is also nice because it is always changing and it hasn't gotten boring. Oh Leaves Sweater how I love you!

Project #3: Seedling Sweater from the book Minnies: made out of Filatura Di Crosa Zara Plus

I started this project out of necessity sort of. You see, The Scarlet Skein had a huge 75% off sale and I just had to buy 60+ balls of Zara Plus. So I ended up with only 4 of this color and that is just enough to make the 12 month size that will fit my daughter for not much longer. So that's how this one got on the needles. It's going pretty quickly. The strange this is that the pattern called for a size 8 needle and I had to go up to a size 10.5 to get gauge. And I'm using the same weight of yarn the pattern calls for. Go figure!

Project #4: Smock Coat from Simply Baby: made with Debbie Bliss Cotton Cashmere

I also have a love/hate relationship with this project. I love the pattern. I cannot wait to see little Ava running around in a cute little red coat. I love the yarn. I have used this one in the past and I love the drape of the fabric. I HATE knitting it. It is miles and miles of seed stitch on size 4 needles. It is really boring me to tears. The problem is that I have to finish it this season so Ava can wear it while it fits her. So I'm going to have to set up knitting incentives for myself to finish this one up.

Project #5: Tilted Duster out of Interweave Knits: made out of Filatura Di Crosa Zara Plus

More uses for my Zara Plus! I really really really love this pattern. It's just the kind of sweater I would wear all winter long. The Zara is 100% merino so it will be so warm. Zara is also machine wash and dry. I did up a swatch and through it in the washer and dryer and the fabric softened and held up great! So I think I am going to be more than happy with the finished result!

I think what I am going to have to do to make some serious headway here, is pick just two projects for awhile to rotate. Hopefully that will make me actually finish something. I think one of those projects is going to have to be the Smock Coat and the second will either be Leaves Sweater or Tilted Duster because I enjoy those so much.

On top of all that knitting is the knitting I do for the shop. So I just purchased the Felt Clog pattern by Fiber Trends and the Children's Felt Clogs too. Over the past few days I knit up a pair of the children's clogs in Ava's size. Im going to do a pair for me next. My plan is to get that done quickly so I can put them on display at The Scarlet Skein. In January I'd like to offer a class on the pattern and also a fun extra class on embellishing the clogs with needle felting. I'm going to bring all my roving and just let those who sign up come and play with the colors and design.

And as if I needed any more yarn or any more projects, I also bought this:

This is Lorna's Laces Lion and Lamb in the Gold Rush colorway. I have big plans to make the Clapotis Shawl. I think that too would make an awesome class for January. It is such a popular pattern right now!

I have no clue how I'm going to get all this done. The good news is that tomorrow my husband and I are leaving for an overnight stay in the Santa Barbara area. That means some extra knitting time for me. I'm planning on bringing the Smock Coat and the materials for the Felted Clogs. I really really want to start the Clapotis but I am trying to be responsible and hold off.
It should be a fun trip, and my very sweet husband recommended that tomorrow will be reserved for yarn stores. I can't wait.

"Never Not Knitting" is not knitting....

....I'm crocheting....


Ava can't believe it either so she leans in for a closer look.


The truth of the matter is... I next to never crochet. I of course teach my crochet classes but besides that, there is no crochet happening in our home. The last crochet project I did was over a year ago now. The interesting thing about this is that I learned how to crochet even before I learned how to knit and for a long time that's all I did. Even AFTER I learned to knit. Surprising? I'm not sure why I turned into more of a knitter than crocheter...but it probably has to do with the fact that I have produced more crocheted acrylic atrocities than any 90 year old Grandma could dream up.


But this project will be different.....I hope.


Yes, I finally drug out my half finished Leaves Sweater that has not been touched since November of last year. If the thought of a crocheted sweater gives you scratchy acrylic nightmares, you are not alone, and don't worry this isn't that type of sweater. I am knitting it in Debbie Bliss Baby Cashmerino, which by the way is so soft!


It has been fun doing a bit of crochet again, but truthfully I am feeling nervous (queasy) about the end product. (I, of course, did carefully explain to the Leaves Sweater that I have no problem disposing of sweaters that make me look fat, quoting the Klaralund sweater as an example.) It is just too soon to tell whether this project will be a cute sweater or make me look like a dated, crochet-clad super freak. We will just have to wait and see....


I do think that the crocheted edging is pretty though...

The Finished Objects of 2007

Well, It is the last day of 2007! The year has certainly flown by! I've realized that I am always so concerned with how much knitting I have to do but sometimes I think that I should reflect on all that I have accomplished. The end of 2007 has allowed me to look back on the year and count up all of my finished objects. Here is the rundown.....

I have completed in 2007:

5 baby/toddler sweaters
7 baby/toddler hats
2 headbands
2 pairs of mittens
2.5 pairs of adult socks
3 pairs of toddler socks
2 adult sweaters
4 dishcloths
3 felted bags
1 felted diaper bag
1 camisole
1 thong
1 crocheted purse
1 knitted lace bag
1 tea cozy
1 teddy bear
1 teddy bear sweater
8 scarves
6 adult hats
2 knitted flowers
1 pair of gauntlets
1 caplet
1 wrist band
1 lace shawl
1 pair of baby booties
1 shawl
1 felted box
2 pairs of adult slippers
1 pair of toddler slippers
2 pairs of leg warmers

Bringing the grand total to 66 completed items! (And no, I didn't count the 1 sock that doesn't have a mate.)

So, thinking about the 66 items makes me feel really good. I have a nice collection of hand knit things around the house and all my friends and family have at least one hand knit item from me. I guess that it makes me realize that I actually AM accomplishing something.

I also added up all of the finishing and repair jobs I did over 2007.

I seamed/finished:

6 adult sweaters
1 tank top
5 baby sweaters
5 miscellaneous small projects
I also repaired 5 afghans

I unfortunately still have 6 unfinished objects:

a project for a customer (a kitchen aid stand mixer cover)
Ava's red Smock Coat ARRRRGGGHH I have to work on that!
my crocheted Leaves Sweater
my Tilted Duster
my Klaralund sweater
Ava's Seedling sweater

Right now they are all on the back burner because I am working on a Top Secret project to submit to Knitty.com. The rules state that I am not supposed to blog about the project or pattern until it shows up in the issue, if it ever does. I'm really excited about it. I've never done anything like this before! I thought I might as well give it a try! The deadline is Jan 5th and I just decided that I wanted to do this so I have really been knitting every chance I get to get this all done. If Knitty decides that the pattern is not their thing then I will just put the samples on display at The Scarlet Skein and make a class out of it! You see, I am thinking positively. I'm trying not to get my hopes up too much.

My knitting goals for 2008:

DO SOMETHING ABOUT THIS!


I wish that I could tell you that this is all of it. But that would be lying. There is actually more....
I think I have a problem. So anyways.... yeah, 2008 Im gonna knit it. Or most of it, at least. :)


I'd also really like to submit a pattern every quarter to Knitty. I have some good ideas and I think it will be really fun. We'll see how this one goes though.

Better bands and cuffs--the wrap-up

Hard to believe it taken from the end of October to the middle of January for this blog to wade through the topic of "better bands and cuffs." Part of the time-span is because posts on other subjects sometimes broke in to derail the train of thought. Between taking so long and being interrupted with other subjects, it seemed wise to wind up this series by tying it together in a (hopefully) coherent way: the wrap-up which constitutes today's post.

The series starts with a prequel, and runs through 9 further posts, 11 total if you include the prequel and this wrap-up post. (Whew!)

The prequel to the series goes over knitted fabrics which don't curl: GARTER, SEED STITCH, RIBBING and DOUBLE MOSS STITCH.

The series proper starts with the post called "Opera and soap opera" which offers an overview of the problem. This post introduces NORM, WANDA and LON. Norm is a normal stitch--situated in the middle of a stockinette fabric. Norm is supported on all sides by his "sibling" and "cousin" stitches. These all share yarn so that stress leaves Norm literally unmoved--he is pinned in place and will return to shape when the stress (from a poking elbow or the like) is removed. Wanda is an edge stitch at the bottom of a sweater band. Stress makes Wanda wander: a stretch or a poke leaves her all ruffled because she has no support along the entire bottom edge: once she stretches, there are no sibling and cousin stitches among whom to distribute the stress and who can bring her into shape again. Lon is an edge stitch on a front band. Lon stretches out long when stressed, because, like Wanda, he has no support along the stretched out edge to pull him back into shape. The conclusion of the first part is that UNSUPPORTED EDGE STITCHES (Wanda and Lon) are the reason GARMENT EDGES RUFFLE and STRETCH OUT.

The second post (Why cuffs and bands are wonky, and what to do about it) suggests a cure: If you KEEP THE EDGE STITCHES OF THE FABRIC AWAY FROM THE EDGES of KNITTED GARMENTS, the edge stitches can't stretch out. In Norm, Wanda and Lon terms, keeping Wanda and Lon away from the edge means that the edges are populated by Norm-type stitches: supported on all sides, these stitches can easily recover from the stretching stresses to which garment edges are subjected.

This part of the series also laid out the easiest way of keeping the edge stitches of the fabric away from the edge stitches of the garment: a SIMPLE ROLLED STOCKINETTE EDGE.

The third part of the series discusses another method of keeping the edge stitches of the fabric away from the edge of the knitted garment, making HEMS AND FACINGS. Again, this works because the edge of the garment is actually made up of Norm-type supported stitches--the Wanda- and Lon-type edge stitches are carefully tucked in on the inside where they are simply not subjected to the stretching stresses present at the garment edge.

The fourth part discusses how to KNIT SHUT A HEM, either a rollover hem, or a hem with a fold line.

The fifth part discusses why knitting shut a hem is best on narrow tubes (socks, cuffs) but how knitted hems flip up on long seams like those at the bottom band of a sweater. The alternative to knitting shut is laid out: SEWING SHUT A HEM.

The sixth part of the series changes direction away from strategies to keep unsupported edge stitches away from the edge of garments. Instead, this post accepts that sometimes the edges of the fabric will be the edges of the garment, and talks about how to stop such fabric/garment edges from flipping and curling. This sixth post also reaches back to the prequel post about non-curling fabrics such as ribbing, moss and garter. You see, the curling and flipping problem actually arises from stockinette's severe tendencies to want to curl. Even when non-curling fabrics are attached to it, stockinette wants so desperately to curl that it simply takes the "non-curling" edge right along with it. This sixth installment shows how STEAMING AND IRONING can help persuade stockinette away from this unruly behavior.

The seventh part also deals with stockinette edged with "non-curling" fabrics: this post lays out a way to knit single-layer fabric edgings which DON'T flip and curl (or at least, which don't flip and curl as much): ZIG-ZAG BANDS. Zig zag bands solve (or at least: help solve) the curling-stockinette problem because the zig-zag pattern breaks up the fault line along which the stockinette wants to curl. The most common use for a zig-zag band is an improved method to attach a garter stitch edging to a stockinette stitch fabric, a scarf, for example, or the garter-stitch front bands of a stockinette sweater.

The eighth post in the series shows TUBULAR CAST ON for a 1x1 ribbing--a method which controls the edge of a ribbing from spreading.

The ninth part lays out the matching TUBULAR CAST OFF for 1x1 ribbing--a method which makes the exact same edge as the tubular cast on, only at the bound OFF edge.

These two posts--the tubular edge posts--really address a very specific bit of the overall wonky-band issue: the problem of controlling stretching in the very edge stitches of a ribbed fabric. Nevertheless, SO many garments are edged with an unhemmed ribbed fabric that the tubular cast-ON and tubular cast-OFF really might be the most useful posts of the whole series.

Tubular cast-on and -off are really spectacularly successful in turning "home-made" knitting into "handcrafted" goodness, and they both work because they stick a Norm-type stitch--a fully supported stitch--at the very, very edge of the ribbed fabric. In other words, we have completely eliminated Lon and Wanda type stitches, and we have turned them all into Norm-type stitches with these two nifty, nifty tricks. In the process, we have come full circle from the first posts to the last, and this is the end of "of the better cuffs and bands" series. Thank you for reading along!

One final thing: some readers have expressed interest in tubular cast ON and OFF for 2x2 ribbings (k2, p2). Although several methods are familiar to me, none are anywhere near as nice as the tubular cast on and cast off for 1x1 ribbing. I'll keep working away on this problem and will be sure to post if some new trick reveals itself.

--TECHknitter
(You have been reading TECHknitting on: "Tricks for knitting better cuffs and bands, series review and summary)
My Dale pattern book arrived promptly from the US not Canada as I previously thought. The proper title is Dale of Norway Commemorative Collection: New Designs for Men and Women, NR 8501.

Some of the photos are a bit blurry and grainy but I did notice one interesting thing. The photographs from most Dale patterns I've seen look machine knit as in this sleeve detail from the Lake Louise pattern.


Check this out - this detail from the Le Massif sleeve almost looks hand knit, doesn't it? Or perhaps that is what Falk looks like machine knit? All the patterns are in either Heilo or Falk.


As I predicted, DH has requested I make him the Whistler sweater. I prefer the Le Massif pattern so I am at least going to make the Le Massif hat for him as my next project. Here's the Whistler in one colorway - it is all about the maple leaves.


In this colorway of Whistler you can't really tell that it is knit in both navy and black. I am admiring the fancy Dale zipper but haven't yet checked out how much that will cost. When I knit the Dale Sirdal cardigan the beautiful traditional Dale braiding and buttons cost more than the yarn I used.


I'm planning to knit this sweater for December although I will probably have many modifications. DH insists on ribbing so I'll add that at the cuffs and I'm also going to use the maple leaf motif there as well.

I think I'm going to knit this in Peruvian Highland Sport to cut down on the warmth - I've used sport weight before as an alternative to Heilo (DK weight) and I can usually get away with it by going up a needle size. I'd prefer knitting with Heilo but unfortunately he'll never wear it if I make it too heavy. I knit him the Dale SLC Olympic sweater in Heilo and so far he's only worn it once. sigh

The main color will probably be Tapestry Blue. I'm also going to add a few more colors than the original four to the cuffs, shoulders, and collar . I was thinking about adding a lice stitch to the boring plain stockinette portion of the sweater but unfortunately I don't think DH would like the effect.

Green Sweater

Here the green knitwear model


This sweater has been heavily varied. If you module notice there are no leaves in this Leaves Human. The copy calls for folio equivalent thingys hanging down from the hem. I likable them in the pictures but when I started needlework them onto my person I decided that it looked totally too "Peter Pan-ish" especially with this form chromatic.

I also else 2-3 inches in size to the body and the sleeves, and didn't sew on any participant string as the graph called for.


A New Sweater And The Bag It Calls Home


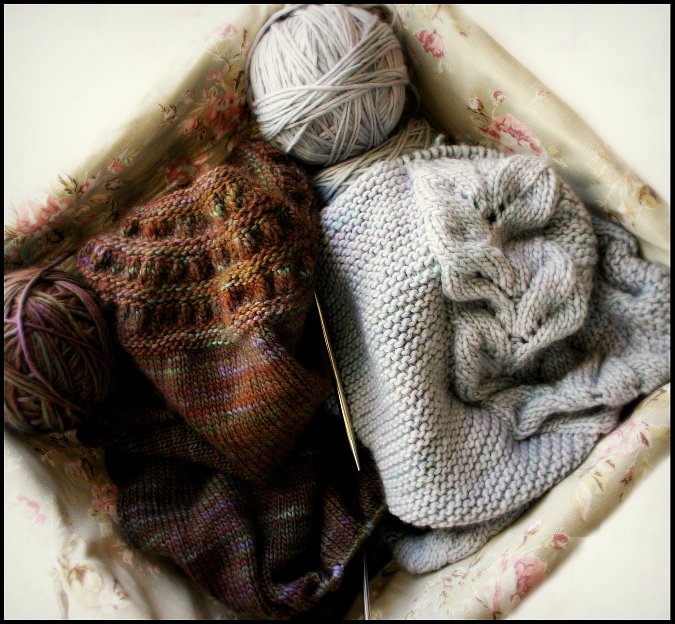
I recently fell in love with yet another sweater pattern. The Tea Leaves Cardigan by madelinetosh. Even though I still have a few projects currently on the needles, I felt the need to cast on for this one right away.


Do you blame me? Seriously.

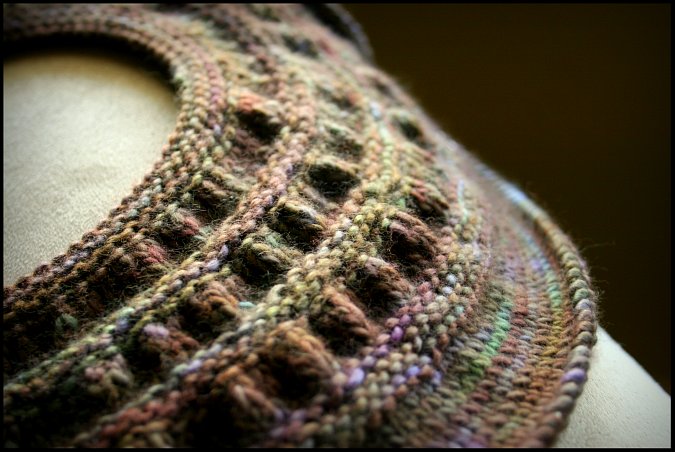
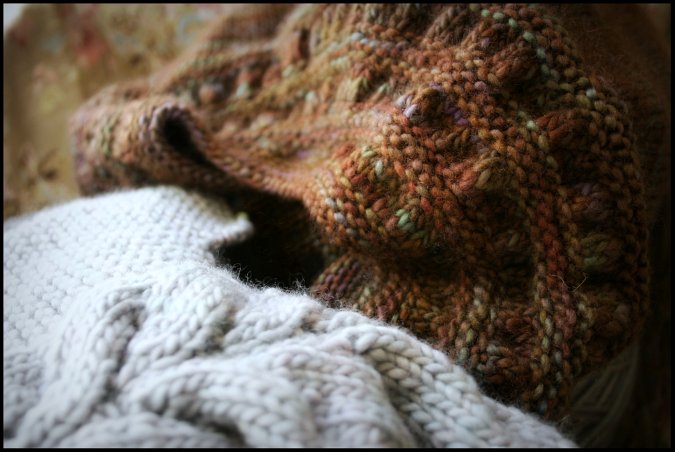
Is it just me.. or is this ruched yoke pattern in this colorway of madelinetosh merino pretty much the most beautiful thing ever?

I decided that I had to go with the Tannehill colorway for my sweater, just like the original pattern photo. This color intrigued me in the pictures and is equally stunning in real life. Usually I would be scared of so many colors thrown together in one yarn.. but its so elegantly executed. It's truly unique and lovely.

(Be sure to listen to Episode 30 of the NeverNotKnitting podcast airing tomorrow.
There will be a special offer from Backwards Loop for the madelinetosh yarns.)


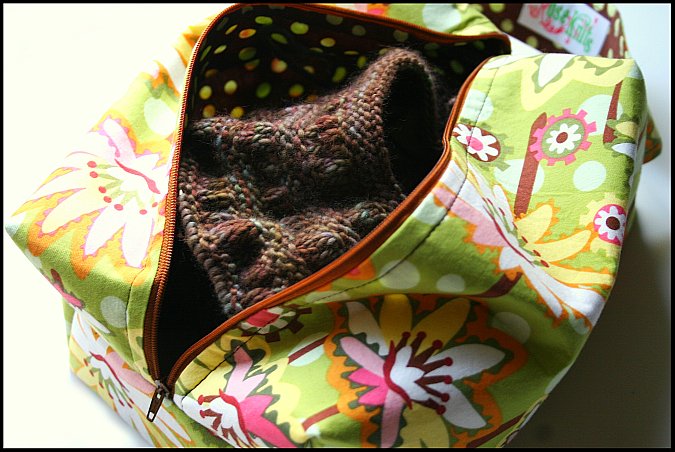
Plus I had to have something exciting and new to put into my new RoseKnits project bag.
If you aren't familiar with these bags, I highly suggest you check out RoseKnits etsy shop and the selection at Backwards Loop.

I am in love with this little bag. It holds 2 balls of yarn, my work-in-progress and the pattern quite comfortably with room to spare!

And it's a whole lot cuter than the gallon size ziploc bags that I normally use...


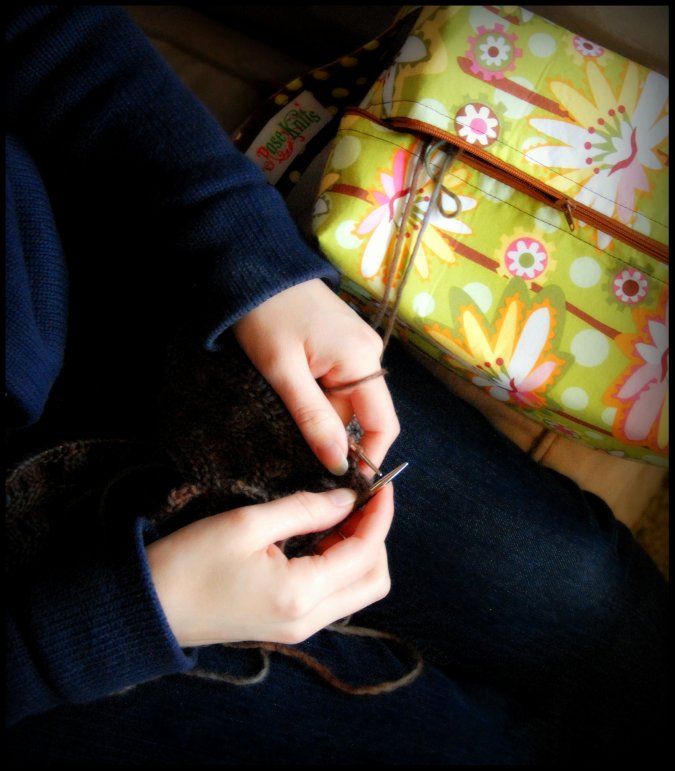
I also love that it has its own handle! Perfect for knitting on the go!


Ginny asked about the Dale of Norway Kashmir sweater. You can purchase the pattern alone at Bea Ellis Knitwear or the entire kit at Allegro Yarns which includes a good photo. If you decide to make it in the Tiur, I recommend purchasing the pattern before getting the actual yarn because there are three colorways and all the colorways are quite similar. You really need to see the actual pattern photo to decide on your colorway. There are also optional beads used in the sweater - I haven't yet decided whether or not to use them.


I have too many projects waiting in the wings. I've put off the Paradoxical Mittens for a while after discovering a mistake I can't live with in the early stages of the mitten and ripping back. My future WIPs include:


1. Lucy Neatby's Paradoxical Mittens

2. The silk/rayon Heartstrings Fiberarts Maple Leaves lace scarf

3. Dale of Norway's Kashmir in Tiur

4. Alice Starmore's Na Craga in Nature Spun

5. Borealis Sweaterscapes' Landscape socks (see photo of patterns below)

6. Two pairs of Sanquhar gloves

7. Cast On Mitered Mittens with handspun yarn

8. Arnhild's Norwegian gloves

9. Norwegian mitten kit from NFA in Istra (I forget the pattern name)

10. Baby sweater


Dale of Norway Whiteface Mountain Sweater

64! I have 64 knitting books. I only counted books with bindings that had titles you could read when they were stacked in a bookshelf so that leaves out pattern books like Ron Schweitzer's Appalachian Portraits and self-published spiral books. Of the 64 books, 8 are Starmore books (my precious babies!), 19 are technique books, and 8 are sock knitting books. I rarely even knit socks anymore.

I have one more book on the way (the Zoe Mellor baby bootee book, bought after those kindly folks at the Crafter's Choice book club told me they'd charge me for a book anyway if I didn't order one immediately) and several more I need to buy for Level III. It is a disaster in the crafts room.

Poor Larry managed to stab himself with a knitting needle - there was even blood involved! I live in fear of sitting on a tiny metal dpn. I can only imagine that trip to the emergency room.

Here's Jeanette's chef d'oeuvre (i.e., masterpiece - I only used that term to impress Louise in France) which was her first colorwork knitting. She knit it when she was 15 years old. The sweater is Dale of Norway's Whiteface Mountain sweater knit in Heilo yarn.


Squishy Sweaters

This winter I have really enjoyed working on sweaters. But not just any sweaters.. sweaters knit from single ply soft merino wool.
It's my new knitting obsession.

There is nothing like spending a wintry evening inside
with a warm merino sweater on your lap.
There is something so cozy and comforting about the process.

These two in the photo are my Vine Yoke and Tea Leaves Cardigans.
One is knit in Malabrigo Worsted and the other in Tosh Merino.
Two very similar yarns. Equally soft and squishy.


I've been making fine progress.. they are both over halfway completed!
I'm very excited to get them done.. but will miss working on them at the same time.

Thankfully I came across another sweater pattern recently which would make another wonderfully squishy project.
Click here to see. I'm thinking about Tosh Merino in Tart for this one.

Wow. I love yarn.

Olympic Knitting Update

I'm still working  on the basic gloves for the beginner glove booklet and the Spontaneous Scarf. I probably will dash off a quick Nordic headband in honor of the Olympics.

I do have a few Olympic knitting links:

HERE is the striking Nordic hat the athletes from Andorra were wearing during the Parade of Nations in last night's Opening Ceremony. Check the photo for the navy, white, and red one - also someone on Ravelry had a screen shot of one athlete wearing the white/blue/black version. Apparently HERE is the  sweater they were wearing.


If you have an extra $425 burning a hole in your pocket, HERE is the Ralph Lauren Aran sweater worn by the US athletes in the Opening Ceremony.

If you want to knit a moose? hat like the ones the US athletes were wearing, HERE is a free pattern that should get you started.

HERE is a free pattern for some Olympic mittens to coordinate with the official gear worn by the Canadian athletes.

ETA: HERE is a free pattern for red mittens with a maple leaf like the Canadian athletes were wearing. Also, HERE is a free pattern for the red and white O Canada Mittens complete with maple leaves and Olympic rings.

Finally, you absolutely must check out Ruth's beautifully-photographed blog. She is a knitter/dyer extraordinaire who lives in Whistler (quite possibly the most beautiful place on the planet) and is planning to get a lot of on-the-scenes photos of the Olympic festivities.


Once again Happy Valentine's Day!

Where the ribbing ends: improving the transition zone

click picture
ribbing transition zonesincludes a how-to
The transition zone where the ribbing meets the sweater (hat, mitten) is the subject of today's post. (A future post will be about the lower (outer) edge of the ribbing itself, and a DIFFERENT future post will cover the issue of ribbing on picked-up stitches.)
* * *
Where the ribbing meets the sweater is often a weak spot in knitting. Along with the change of stitch pattern comes a distortion in the column of knit stitches, especially when switching from ribbing to stockinette fabric. Although this is no earth-shattering condition, it's so easy to improve that you might as well--for the cumulative effect of little improvements is greater than you might believe.

For various arcane reasons, the transition zone between ribbing and the body of the garment is actually more of a problem for top-down ribbing. Therefore, as the second photo below demonstrates, the improvement is correspondingly more dramatic for top-down knitting. However, the first photo shows that bottom-up ribbing also benefits from an improved transition zone.

Here is the how-to:

FOR RIBBING STARTED FROM THE BOTTOM UP

For the purposes of this discussion, I assume you are at the point where you are going to switch FROM ribbing TO stockinette or a patterned fabric.
  • On the LAST ribbing row, SLIP every knit stitch (slip them "open," also called purlwise"). Purl every purl stitch.
  • After this last row or round of ribbing, switch to the larger needle you'll use for the body size, and begin the body of the garment.
click picturetop down 1x1 ribbing
(Photo above) In bottom-up ribbing, the improvement is subtle, but still visible. The corrected knit columns bridge more directly from the ribbing to the body of the fabric (right arrow). Although it's hard to tell from this photo, the uncorrected transition zone (left arrow) features a bulkier transition from ribbing to the smoother stockinette fabric of the garment body.

FOR RIBBING STARTED FROM THE TOP DOWN

For the purposes of this discussion, I assume you have worked your garment down to the point where you want your ribbing to start.
  • Using the needle size for the ribbing (usually a needle 2-3 sizes smaller than that with which you worked the body of the garment) work one last row or round in the body pattern (i.e.: the last row of stockinette, or whatever you were working).
  • On the next row or round (the first row of ribbing) SLIP every knit stitch (slip them "open," also called purlwise.") Purl every purl stitch.
  • After this first row or round, work the ribbing in the usual way to the desired length.
click picture
top down 2x2 ribbing(Photo above) The corrected knit columns bridge more directly from the body of the fabric to the ribbing (right arrow). The unimproved transition zone (left arrow) features wandering, zig-zagging knit columns.
* * *

ribbing w/increasesMarjorie, a reader of this blog, asks the excellent question of how to reconcile the technique set forth in the post--slipping the knit stitches--with the advice often given in patterns to start bottom-up ribbing on fewer stitches, and then increase to the larger body number of sitches "evenly in the last row." Per the photo (left) if the fabric above the ribbing is to be stockinette, or a near-stockinette fabric, it would be my advice to do all increases on a purl using an increase, such as backwards loop, which leaves a "bump." This "bump" will blend into the purls. By not making increases on the knit columns you will have preserved the attractive transition where the knit columns of the ribbing segue into the knit columns of the stockinette fabric above it.


* * *
A final note: although 1X1 ribbing is demonstrated in bottom-up knitting, and 2X2 ribbing is demonstrated in top-down knitting, the directions given for bottom-up ribbing work for both 1X1 AND 2X2 ribbing worked from the bottom up.

Similarly, the directions given for top-down ribbing work for both 1X1 AND 2X2 ribbing worked from the top down.

If you want to work a 3X3 or larger, do a swatch to decide for yourself whether the slip-the-knit-stitches technique creates a noticible improvement over so wide a rib.

--TECHknitter

Right decreases, the good twin--part 1 of right and left leaning decreases

Includes 4 illustrations
WELCOME BACK!
Welcome back to TECHknitting. I hope you all had a lovely summer, and that everything you wished for yourselves and your loved ones came true during these past few months. For me, the end of summer means my knitting batteries are recharged and it's back to illustrating knitting tricks for a second season. I hope you'll read along through this upcoming fall and winter, as more tricks desperate to escape my mind try to leap off the screen to infect yours.

WHAT'S the TOPIC?
Traveling through the knitting sector of the blogosphere, I read lots of complaints about left leaning decreases, especially "slip, slip, knit," abbreviated "ssk." A lot of you are complaining that your (left leaning) ssk's are sloppy--you're complaining that they don't look like much like your neat and tidy knit 2 together's (k2tog, right leaning). (Click HERE for sketch illustrations of both.) So, I thought you might like a series on right and left leaning decreases, with a focus on improving the left leaning ones.

Today's post, the first in the series of four, provides background material--it's all about the main right leaning decrease, k2tog. The second in the series will examine ssk as well as the left leaning decrease called "slip 1, knit 1, pass the slipped stitch over" (psso). The third and fourth posts will have illustrations and instructions for two new ways to make left-leaning decreases.

A CAVEAT
One thing before I dig in. The fact is, that loose ssk (or psso) might not be as bad as you think. Knitting while you are creating it doesn't always look a whole lot like knitting once you are wearing it. Those loose, bumpy, left leaning decreases on your needles will eventually even out and look a great deal more like the tight and tidy right leaning decreases you admire, while the right leaning decreases will relax to bring the appearances even closer. The appearance won't be identical, but it'll be a whole lot closer than it is on the needles. As the great Elizabeth Zimmerman put it in the opening pages of her magnificent book, Knitting without Tears:
"I used to think that people in the Olden Days were marvelously even knitters, because all really ancient sweaters are so smooth and regular. Now I realize that they probably knitted just as I do, rather erratically, and that it is Time, the Great Leveler, which has wrought the change--Time and many washings."
I am quoting the greatest-knitter-of-us-all to absolve you if you aren't inclined to wrap your mind around all the complications I am going to dig into. If you can live with ssk (or psso, or any other method of left-leaning decrease you know) then you will find that these left-leaning decreases only improve with age. If you choose to, you will be justified in resolutely ignoring the lumpy left-leaning decreases on your needles, knowing that in the fullness of time, they WILL look better--and you can skip the rest of this post and read a different blog for today.

IF, HOWEVER,
you're still with me, if ignoring lumpy bumps isn't in your nature, or if you just like to fool around with things, here we go...

WHY DECREASES "LEAN"
Knitting, as you know, is connected in the rows AND in the columns. You can rip it out row-wise, or you can create runs by ripping it out column-wise. This means that anything you do to any knitted stitch in any given row not only has the potential to affect the stitches on either side of it in that row, but also has the potential to affect the column in which that stitch lies. In fact, it is the column effect of stacked decreases which is the most eye-catching --isolated single decreases can be done any old way, really, without making much of a difference to the finished fabric.

Used in pairs, or in matching columns, right leaning decreases and left leaning decreases are meant to be twins. And, in a purely mechanical sense, they are. Each performs the same function in mirror image. Either type of decrease removes one stitch from the knitted fabric, eliminating one column of stitches so there is now one column of stitches where two columns were before. In the illustration below, a right leaning decrease causes two bright green columns to become one dark green column, while a left leaning decrease causes two bright blue columns become one dark blue column.

Just at the spot where the two columns are bridged to become one, the little scar of the actual decrease appears (outlined in red). This scar marks the two stitches bridging over the two old columns. The topmost stitch must slant either right (green) or left (blue) causing the resulting fabric to look as if the left column leaned over and ate the right column or vice versa.
When these little decrease scars are stacked atop one another, a pattern appears: the column in which the decrease consistently lies appears to be eating all the columns slanting away below it. This is the familiar line of decreases which provides the spiral shaping to a hat crown knitted bottom-up, the decreasing diameter of a sleeve knit from shoulder to cuff, the lines of decrease on either side of a raglan shouldered sweater knitted bottom-up, or the line on either side of a v-neck knitted bottom-up. (The sweater below is clearly a mutant: regardless of whether it was knit top-down or bottom-up, some of the shaping lines (red) would have had to be knit as stacked increases, not decreases, but I think you get the idea...)
A continuous line of right leaning decreases are easy to make, and they look lovely and tidy as they slant off rightwards with no sloppy malformed stitches. Right leaning decreases are the good twin--the column of the decrease features regular, even stitches. The only difference between the right-leaning decrease column and the surrounding columns is its slant--the stitches of the decrease column and the stitches in the surrounding fabric look the same. In fact, in a right leaning decrease column, the stitches are generally so even that is difficult to tell which of the stitches is in the actual decrease row, and which in the "plain" row(s) in between the decrease rows.

By contrast, the stitches of the column in which a left-leaning decrease appears look different than the surrounding stitches, and not just because of the slant. The stitches in a left-leaning decrease column are looser and sloppier--its easy to tell which is the decrease row and which the plain row(s) between decreases--the decrease row is the one sporting bumpy loose eye-catching yarn loops. In comparison to right leaning decreases, left leaning decreases are the evil twin.

As stated above, the situation is actually worst just at the moment you are knitting the left-leaning decrease--it isn't actually all that much of a difference once the garment has been worn and washed a few times. But if this aspect of knitting is still driving you "knuts," then to solve this problem, we'll start by looking at the good twin, right leaning decreases.

THE MECHANICS OF A RIGHT-LEANING DECREASE
To make the right leaning decrease called knit 2 together (k2tog) you insert your right needle "knitwise" (from left to right) into the second stitch (green) on your left needle, and then thread it through the first stitch (red) on your left needle, also knitwise, as shown below. This leaves the two stitches on the tip of your left needle impaled on knitwise on your right needle, as shown below.
The standing yarn is brought into position to create the next stitch and the red and green stitch are knit together from this position, with the green stitch which caps the leftmost column on top. The green and red stitches are knitted together with the new stitch (blue). Because the green stitch from the left column is on top, it appears that the left column leaned over to the right and ate up the rightmost column, as shown below.
Let's think about that sequence again. To make a right leaning decrease, the stitch (red) which lay on the very tip of the left needle was squeezed to the back of the fabric as the second stitch (green) overlaid it. In other words, when the two stitches were knitted together, that first red stitch was forced to the back for all time, as the second, dominant green stitch came to the front of the fabric. If you take the time to knit a quick k2tog right now, turn it to look at the back (reverse stockinette side) of the fabric. You will see a surprisingly large lump where the excess yarn from the first stitch (red) now lays on the back of the fabric. Closer examination shows that very much of the bulk of this second stitch has been squeezed to the back of the fabric. Turn your k2tog over again to expose the fabric face, and you will see that the right arm of the second stitch stitch (green) lays very near to the surface of the knitted fabric--that first red stitch has been so thoroughly squeezed backwards that very little of it comes between the right arm of the second (green) stitch and the fabric surface. The red stitch has been "disappeared."

None of what you've just read is going to change anything about the way you knit k2tog. The real point of this post was to provide the background for the next post. The next post is about the mechanics of slip, slip, knit (ssk) and slip 1, knit 1, pass the slipped stitch over (psso). Until next time...

--TECHknitter
You have been reading TECHknitting on "right leaning decreases (k2tog)."